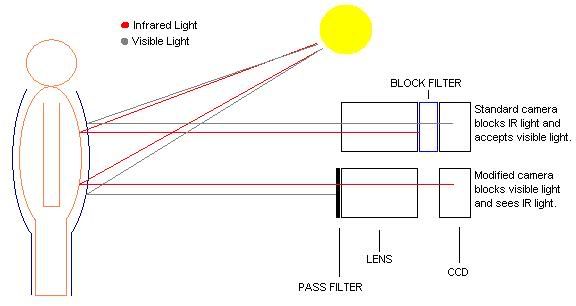
You can make your own infrared ray camera by using a standard webcam. This allows you to use your webcam when in low light. However, it does not turn the webcam into a true night-vision camera. To make an infrared (IR) camera you need to remove the IR filter from the webcam. The webcam will need to be taken apart to gain access the internal components of the device.

Instructions
- 1Locate the screws that are used to secure the casing of the webcam. Remove them with a Phillips screwdriver.
- 2Insert the plastic pry tool into the seam between the front and back of the casing. Turn the pry tool and gently separate the casing into two pieces.
- 3Find the lens retaining ring on the front case. Remove the screws that are used to secure the ring to the casing. Take the retaining ring off and set it aside. Remove the screws that are used to secure the lens assembly to the casing. Take out the lens assembly and set it aside.
- 4Locate the IR filter at the bottom section of the lens assembly. Remove the screws that are used to secure it. Pry the IR filter from the lens assembly with the pry tool.
- 5Cut a film negative to the same size of the IR filter with the scissors. Place the piece of negative in the location of the IR filter.
- 6Reattach the lens assembly to the casing and tighten the screws. Replace the retaining ring and tighten the screws.
- 7Reassemble the two sections of the webcam and tighten the screws.
- 1


