How To Hack the Motorola XOOM Android Tablet


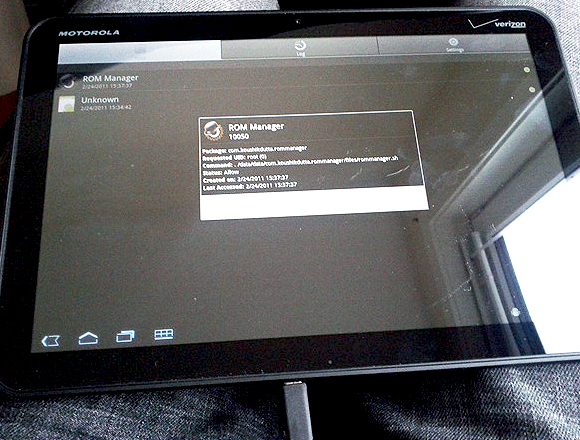
Whether it’s the new iPad Killer or not, one thing’s for sure—the Motorola XOOM is hackable. Just hours after its release last week, Verizon’s new Android-based tablet (running Honeycomb) was rooted by hacker Koushik Dutta, which seems easy enough.
“Since it’s another Google experience device, and ships with fastboot support (albeit, limited), it really does come rooted out of the box. Just needed to figure out the board kernel base, and compile up a new kernel.”
To learn how to root your new Motorola XOOM tablet, just follow Koushik’s directions below. If you prefer to keep your XOOM as is, take a gander at all the XOOM has to offer with the Android 3.0 operating system.

Warning

  • If you root your device now, you will NOT be able to upgrade to 4G LTE from Verizon. Rooting the XOOM will void your warranty and it will not be upgradable to their upcoming 4G LTE service. Click here for information on upgrading your XOOM.
How To Hack the Motorola XOOM Android Tablet (Rooting Guide)
In order to root the Motorola XOOM, you will need adb (Android Debug Bridge) and fastboot installed on your computer.

Step 1 Download USB drivers

To get started, you’ll need to first install the Motorola XOOM’s USB drivers, which you can get here or here.

Step 2 Download the Android SDK

adb is contained within the Android SDK, and is a tool that lets you manage the state of an emulator instance or Android-powered device.
It is a client-server program that includes three components:
  • A client, which runs on your development machine. You can invoke a client from a shell by issuing an adb command. Other Android tools such as the ADT plugin and DDMS also create adb clients.
  • A server, which runs as a background process on your development machine. The server manages communication between the client and the adb daemon running on an emulator or device.
  • A daemon, which runs as a background process on each emulator or device instance.
Download the Android SDK for your operating system (Windows, Mac OS X or Linux). If you need help on installing the SDK, check out the step-by-step instructions.
How To Hack the Motorola XOOM Android Tablet (Rooting Guide)
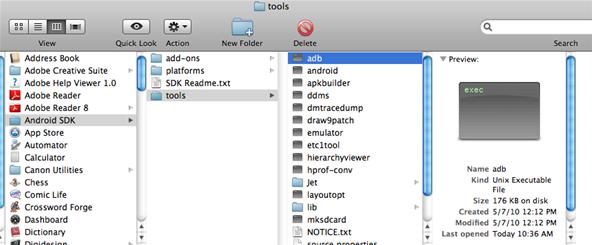
Once installed, you can find theadb tool in<sdk>/platform-tools/. Or directly in the tools folder of the Android SDK folder.
How To Hack the Motorola XOOM Android Tablet (Rooting Guide)

Step 3 Download fastboot

In addition to the adb tool above, you’ll also need to get the command-line fastboot tool to flash the system image of the device. Flashing your device in this way is useful if you need to install the radio and system images independently or you are already familiar with fastboot and are using it successfully in your environment. To use this method, your device must have a fastboot-compatible bootloader. Having the original factory bootloader included on ADP devices is not required.
If you insist on compiling the code yourself, the fastboot source code is available in the Android open source repository and is compiled whenever you build from that tree. If you’ve built from the Android open source tree, you will find the fastboot executable in this location:
<build-dir>/out/host/<platform>/bin/
But if you don’t want to bother with that, just download the fastboot executable directly at the HTC Developer website.
How To Hack the Motorola XOOM Android Tablet (Rooting Guide)

Step 4 Download the XOOM root file

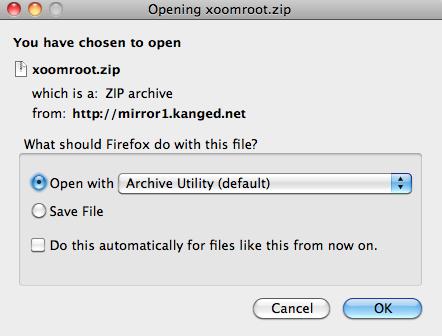
You can get XOOM root ZIP file right here, which is built with the tegra: stingray kernel.
How To Hack the Motorola XOOM Android Tablet (Rooting Guide)

Step 5 Unzip the package

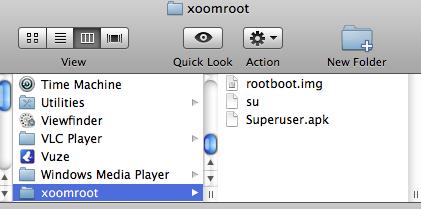
Use an un-zipper tool like WinZip or Apple’s built-in support for unpacking ZIP files. It includes three files: rootboot.imgsu, and Superuser.apk.
How To Hack the Motorola XOOM Android Tablet (Rooting Guide)

Step 6 Power Off the XOOM

Make sure your XOOM is connected via USB and then power if off.

Step 7 Reboot

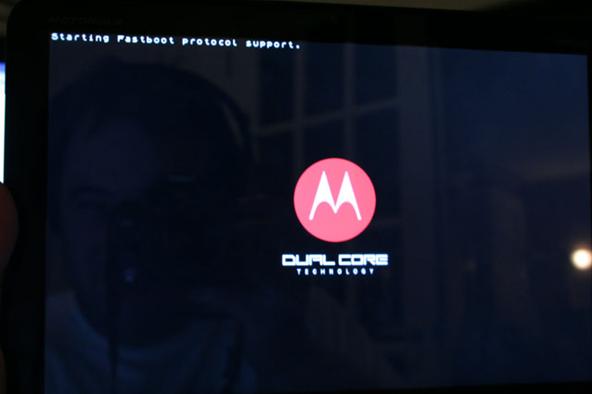
In order to reboot, press the volume down and power buttons at the same time. Don’t release the buttons until you see “Starting Fastboot protocol support” in the upper left-hand corner of the XOOM display.
How To Hack the Motorola XOOM Android Tablet (Rooting Guide)

Step 8 Open up a terminal window

Open up a terminal window (or command prompt if on Windows) and navigate to your Android SDK “tools” folder (inside the Android SDK folder, where you installed that to) where fastboot resides. Then enter the command:
fastboot oem unlock

Step 9 Unlock the XOOM

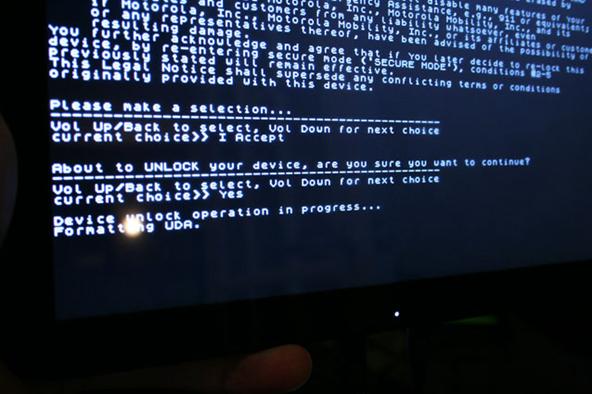
On your XOOM’s display, you should see a warning message asking if you want to continue unlocking your device. Doing so will void the warranty. Press the volume down button until it states “Yes“, then press the volume up button to beginning unlocking. Wait for a reboot.
How To Hack the Motorola XOOM Android Tablet (Rooting Guide)

Step 10 Enable USB Debugging and reboot

Once your Motorola XOOM has rebooted, connect to a Wi-Fi network or Verizon’s network, but avoid setting up a Google account on your new Android tablet. Then, go to Settings > Applications > Development and enable USB Debugging.
Reboot your device using this command in your terminal window:
adb reboot bootloader

Step 11 Flash the boot image

In the command prompt, use this command to flash the new boot image with fastboot:
fastboot flash boot rootboot.img

Step 12 Reboot

In the command prompt, reboot your device using this command:
fastboot reboot

Step 13 After rebooting…

Wait for the XOOM to reboot to the lock screen. In the terminal window, input the following commands (hitting Enter after each one):
adb remount
adb push su /system/bin/
adb shell
ln –s /system/bin/su /system/xbin/su

chmod 4755 /system/bin/su
exit
adb push Superuser.apk /system/app/

Step 14 Verify

To check and make sure you had a successful reboot, enter adb shell into the command prompt and you’ll get a # prompt.
And that’s it—the Motorola XOOM is now rooted with the Superuser app.

Warnings

  • The Motorola XOOM’s microSD card slot is not active. A future software upgrade
    will enable this device to support microSD cards up to 32GB. So keep in mind, due to nonfunctional microSD card slots in the device, you won’t be able to recover your device, at least not until they release a firmware update that enables the slot. I’m guessing it won’t get the firmware update until it’s ready for 4G LTE.
  • For updates on a working recovery, check on Koushik Dutta’s website.
  • ROM Manager support will come as soon as the microSD card slot is updated, free and premium versions.
  • Never accept a Verizon or Motorola update after rooting!
Read More

How To Hack Your Nook Color into a Full Android Tablet


Thanks to online music services like eMusic and iTunes, compact discs are becoming a far distant memory, turning local music shops around the country into desolate wastelands. The once mighty movie rental store Blockbuster is now bankrupt because of online streaming services like Hulu and Netflix. And Borders and Barnes & Noble are closing stores left and right thanks to eBooks available on eReaders, like the Amazon Kindle. Everything is moving to the digital world, and everything is finding smaller, more compact ways of viewing it.
But chances are, you’re not willing to pay the expensive prices for those “jack of all trades” devices—the tablet computers that let you read eBooks, watch movies and listen to music on just one device. These days, the Apple iPad will run you at least $500, and the new Motorola XOOM will cost you a whopping minimum of $800.
How To Hack Your Nook Color into a Full (But Cheap) Android TabletA tablet would merely be a luxury item for most of us. If you want to listen to music, you’ll get one of the many, cheap MP3 players available. If you want to watch movies, try the iPod Touch. If you want to read digital books, then you’ll more than likely settle for the Kindle or the NOOK. But what if there was a way to bypass the hefty price tag of tablet computers? What if you could turn your NOOK into an Android tablet, capable of playing movies and music.
Well, it is possible—with Barnes & Noble’s Nook Color (NOOKcolor, if you try using their hip stylized branding à la iPod).
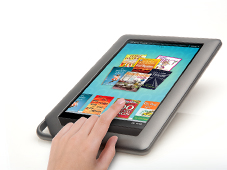
B&N launched the Nook Color to combat the success of the Kindle, offering more interaction than conventional e-book readers. With its color touchscreen and integrated-web apps, you’d think it was an Android tablet.
Oh, wait—IT IS!
Something that isn’t explicitly stated on B&N’s website is that their Nook Color uses Google’s Android mobile operating system. That means it’s made to run the Android OS, so why settle for the dumbed down version when you can have the full OS? The most the Nook Color will cost you is $250. I don’t know about you, but that sure makes me think twice about getting an iPad or XOOM.
In order to turn your Nook Color into a powerful Android tablet, you have to “root” it, which means you’ll be gaining access to the the operating system and making unauthorized changes. In this case, we’ll be using the ADB (the Android loader from the Android SDK) to install apps on the Nook Color.

Warnings

  • Proceed with caution, because this will void your warranty.
  • If done incorrectly, it could also make your device un-bootable, rendering it useless.

Needed

These are the pre-requisites for this hack (you can call it “root” or “jailbreak” if you prefer).
  • B&N Nook Color
  • Available Wi-Fi network
  • microSD card (Class 6, 128 MB or higher)
  • Computer
    * Must be able to read/write microSD cards (with adapter, if necessary)
    * Must have a USB port
  • Google account
  • Android SDK
  • Program that writes disk images
    * dd (Linux, Mac)
    * Win32DiskImager (Windows)
For this example, I’ll be using a Mac computer. But you can find detailed instructions on using Linux or Windows at devNook.

Step 1 Register Your Nook Color with B&N

Before you do anything, make sure to power up your Nook Color and complete B&N’s registration process. If you proceed with the rooting process before doing this, you will not be able to link your Nook to B&N to purchase e-books.
Now you may proceed with “nooting” you Nook.

Step 2 Download the Nooter

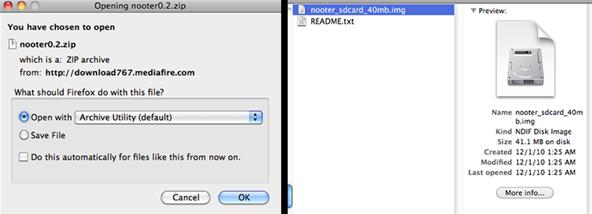
To make use of your microSD card, you’ll need to download nooter_sdcard_40mb.img. Unzip the file, which in my case, was automatically done when it entered my Downloads folder. It will be about 42 MB.
How To Hack Your Nook Color into a Full (But Cheap) Android Tablet

Step 3 Write the microSD Card Image

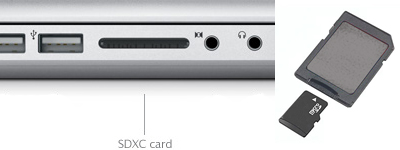
Mount your microSD to your Mac. If you have a MacBook Pro, you can use a passive adapter to mount the microSD card in your SDXC card slot. You can also use a USB card reader.
How To Hack Your Nook Color into a Full (But Cheap) Android Tablet
Open up a terminal window on your Mac and find which drive the microSD card is mapped to. You can do this by typing the command:
diskutil list
Once you’ve found the drive, unmount it using this command (and then press Enter):
diskutil unmountDisk /dev/disk# (make sure to replace the # for your disk number)
Terminal will then tell you:
Unmount of all volumes on disk<#> was successful
Now copy the files from the downloaded nooter file to the microSD card by typing one of the following, depending on your Nook firmware version (and then press Enter):
dd if=/path/to/auto-nooter-2-12-15.img of=/dev/rdisk# bs=1m (for 1.0.0 firmware)
OR
dd if=/path/to/auto-nooter-2.12.25.img of=/dev/rdisk# bs=1m (for 1.0.1 firmware)

Tips

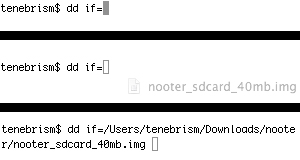
  • Instead of inserting the path to the .img file manually in either instance above, you can find the file in Finder and drag and drop it directly into the terminal window, like illustrated below.
How To Hack Your Nook Color into a Full (But Cheap) Android Tablet
Everything should copy to your card successfully.
Now double check that all of the correct files were copied to the microSD card, which would look like the image below. If everything’s good, remove the microSD card from your computer.
How To Hack Your Nook Color into a Full (But Cheap) Android Tablet

Warnings

  • The above steps will completely erase your microSD card, so make sure you back up all needed data beforehand.

Step 4 Power Down Your Nook Color

Before powering down, make sure that there is no USB cable connected to the device. Then, hold down the power button and power the device off when prompted.

Step 5 Mount the microSD Card via the Nook Color

With your Nook Color powered down, insert the microSD card. Then, plug your USB cable into the device, then to your computer.  The Nook Color will boot the microSD card, but the touchscreen will remain off. If you’re using the supplied Nook cable, then the charge light will blink on your device, which is perfectly fine.
In no time at all, Mac OS X will recognize the device.

Step 6 Noot the Nook

Once the device has shown up, don’t do anything—just wait about five minutes until the script makes the changes to the Nook Color’s file system. Once done, disconnect the USB cable, remove the microSD card and hold down the power button on your Nook Color for about 15 seconds (or more). The Nook should boot normally and you’re all done!
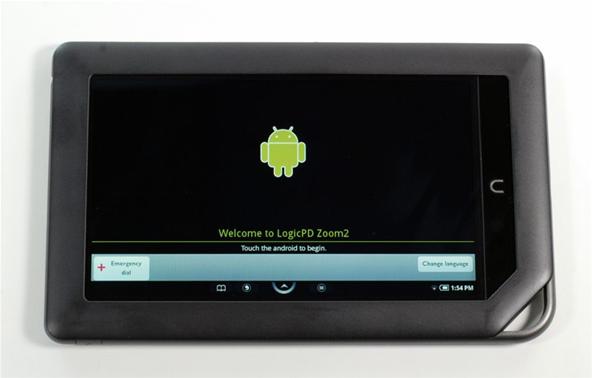
Once it boots, you should see the Nook logo animation, and then the Android logo and welcome message. Touch the logo and log in with your Google account, where you can then download apps to customize your Nook Color as an Android tablet.
How To Hack Your Nook Color into a Full (But Cheap) Android Tablet

Step 7 Customize

Now that the basic root of the Nook Color is finished, there’s a whole world of information to explore when it comes to customize your new Android tablet. Visit nookDevs to get more details on rooting your Nook Color, customizing it, and troubleshooting and problems that arise. You can also find instructions on rooting the Nook Color with Linux or Windows.

Video Help

For those of you who prefer to be walked through the process, check out huskermania’s videos below, for both Mac and Windows.
Rooting the Nook Color on a Mac
Photos by Apple, TechRepublic, B&N
SOURCE devNook VIA TechRepublic

Read More

How To Connect a Bluetooth Mouse and Keyboard to your iPad (or iPhone)!


After years of being a PC technician and Windows System administrator, I had the blind hatred for Apple that I thought I was suppose to have. I swore that I’d never even touch an iPod, let alone buy an Apple product. But I found a new career that drug me out of the Windows server/PC tech room dungeon, and into the bright modern office of a web development firm. Then it happened. After a couple weeks with all this Apple stuff around me, my love for gadgets and (closet) Apple curiosity got the best of me. I picked up a co-workers iPod touch one afternoon and that’s all it took. I went out and bought one that night. That was a couple years and many iPod touches, shuffles, iPhones, iPads, and Airport Wi-Fi installs ago.
Ok, first off…this is absolutely not a Mac vs. PC or iPhone vs. Droid or iWhatever vs. it’s non-Apple counterpart debate. I work 100% on a PC still, and still do alot of side PC tech and network jobs. I honestly don’t really even know how to work a Mac. I love my iPhone, but I think my wife’s Droid is sweet too. I’m all about  taking the best technology out there…regardless of the logo on the bottom…and making it work together to my make my life easier. 
I bought my iPad as soon as it came out. Ok…I was a pre-order guy. I had no idea if it was going to live up to the hype, but I didn’t care. I had to have one. I actually sold a laptop to get it and hoped it was a wise choice. Well, I haven’t looked back for a second. Sure, there is alot an iPad can’t do that a laptop can. But the opposite is also very true. While I can’t imagine now not having my iPad for handwritten note taking and sketching during meetings, the touchscreen and keyboard just wasn’t comfortable for me to sit down and work for extended periods of time. I really couldn’t do any like code editing, it just wasn’t practical. To consider my iPad a solid replacement for my laptop, all I needed was the addition of a Bluetooth keyboard and mouse…

Warnings

  • The following steps require you to first jailbreak your iPad. While it is now technically legal to do so, it will void your warranty from Apple.
  • The apps needed to make this work are not Apple approved, and must be downloaded from a jailbreak app store.
  • If you do decide to follow this tutorial, first back your Ipad up via iTunes…just in case.
I take no responsibility for what happens if you do follow these steps. You are doing this at your own risk! Any troubleshooting steps can be find by browsing the internet, or clicking the links below.

Tips

  • Most bluetooth keyboards and mice should work. My setup is using the Apple Bluetooth Keyboard, and a Microsoft Bluetooth Notebook Mouse 5000 that I had laying around.
  • The following also apply to the iPhone.

Step 1 Jailbreak your iPad

Jailbreaking can be done multiple ways, which can be found via Google. I chose a new and VERY easy process for jailbreaking my iPad. No need for downloading to your computer first. Simply open Safari on your iPad and go to www.jailbreakme.com. Follow the instructions, and that’s it…your iPad is ready to go in just a few minutes. 
**NOTE: As this tutorial is not HOW to jailbreak, initial setup of Cydia is not included. Again, there are many resources easily accessible on the internet to help walk you through it. I had no problems, and it’s pretty self explanatory. The common jailbreaking quote is, “If you don’t understand the initial setup, then jailbreaking is not for you.” After a few minutes I was able to move to Step 2.

Step 2 Access the Cydia App store. 

Once the jailbreak is complete, there will be a new icon on your iPad for the Cydia App store.
How To Connect a Bluetooth Mouse and Keyboard to your iPad (or iPhone)!
Enter this App store and…

Step 3 Install BTstack Mouse

In the Cydia Apps store, click the Search icon in the bottom left corner. Search for BTstack Mouse.
How To Connect a Bluetooth Mouse and Keyboard to your iPad (or iPhone)!

Step 4 Install BTstack Keyboard

Following the same process as Step 3, search for BTstack Keyboard
How To Connect a Bluetooth Mouse and Keyboard to your iPad (or iPhone)!
**Note: There are two options for the keyboard install, a free demo and pay version. I honestly didn’t look at the difference, but I opted for the paid version. The free demo should work as well. 

Step 5 The Apps are installed, now it’s time for pairing your devices!

Once you have completed the last two steps, you will see two new app icons on your iPad for your Bluetooth Keyboard and Mouse.
How To Connect a Bluetooth Mouse and Keyboard to your iPad (or iPhone)!

Step 6 Pair your Bluetooth Keyboard

**Note: The Keyboard MUST be paired first!! I can’t tell you why, but it must go in this order!
Make your keyboard discoverable first, then open the keyboard app. Once your keyboard is displayed, follow the onscreen instructions for pairing. When complete, hit the home button.

Step 7 Pair your Bluetooth Mouse

Now it’s time to pair your mouse. Make the mouse discoverable first, then open the Mouse app. Once your mouse is displayed, follow the onscreen instructions for pairing. When complete, hit the home button.

You are set!

Now you have your own hybrid iPad – portable computer! This setup was a little painful my first time because I couldn’t find a step-by-step process online…hence this post. But now I honestly cannot believe how much this has changed things for me. It really did upgrade my iPad (I know you’ve all heard this…) from a glorified iPod touch, to a near fully functional computer. Email, document/spreadsheet editing, writing code, web browsing…all just became a functional reality using my iPad. There is a learning curve, because you still use the mouse as if using the touchscreen. So gestures are still king, scrolling doesn’t work. But I now find myself trying to click and gesture when I’m on my PC at work!!

Tips

  • If you want to get the most out of your new Keyboard and Mouse, I advise installing Activator and Insomnia.
  • ACTIVATOR: Activator is a programmable app launcher, that will allow you to assign functions to your middle and right click mouse buttons, as well as dozens keyboard hotkeys! (Also, a TON more options using the buttons on your iPad and gesture activated shortcuts.)
  • INSOMNIA: This app allows you to designate certain apps to run in the background, once your iPad enters sleep mode. This app eliminates having to re-pair your devices when your iPad comes out of sleep mode.
Well, I hope you are able to get the most out of this setup, because I know I certainly have! This is my first How-To. I will include more of the cool little tweaks I’ve discovered if the feedback from this post warrants it! So…comment! Let me know what else you want to see, and I’ll see what I can do!

Read More

How to Use Twitter for Customer Service

One of the greatest ways businesses and professionals can use Twitter is as a customer service tool. More and more companies are starting to monitor their online reputation and respond to customer inquiries posted on Twitter, and the companies that do this successfully can benefit in a number of ways.
Twitter

While large and well-known companies are the most visible when it comes to interacting with customers on Twitter, customer service can be a focus of every professional, whether you have an established small business or if you’re a freelancer.

The Benefits of Customer Service in Social Media

There are so many positive benefits that can be gained from a successful customer service-oriented presence on Twitter. Here are a few to consider:
Find Out What Your Clients Really Want
One key way to get value out of Twitter in terms of a customer service tool is by listening. If you’re able to track conversations related not only to your specific business, but also among potential clients discussing their needs, you will gain invaluable insight into what your clients really want from you.
This can play a huge role in your marketing and sales efforts because you can tailor your offerings to meet the individual needs you’ve witnessed discussion about on Twitter, and take time to focus on what current clients are saying outside of your own interactions.
Make Your Clients Feel Valued
There is nothing worse to an unhappy customer than feeling like no one cares. When you invest in a product or service, you have certain expectations about what you will receive in return. And when those expectations are not met, you wind up with a bitter taste in your mouth.
There’s already a serious problem if your clients are moving right to Twitter to air their issues instead of approaching you first. But on an everyday basis, you can watch what your clients are saying and learn to anticipate their needs before they even make it known to you. This type of preventative customer service will create loyal and long-term client relationships.
Happy Clients = Referrals
It’s a well-known fact that word of mouth marketing is powerful. And if you have clients who are extraordinarily happy with the service you provide, you will likely see an increase in referrals. If your clients are inclined to sing your praises, Twitter is a great outlet in which to do that.  And if they’re used to communicating with you on Twitter already, you’re positioned to benefit.  By retweeting and outwardly supporting your clients on Twitter, you will increase the likelihood that they will take reciprocal actions.

How to Provide Excellent Customer Service through Twitter

Use Monitoring Tools
In order to provide customer service on Twitter, you need to know what people are saying about you, about their needs and about the industry in which you work. This can be easily accomplished by routinely checking various resources, including:
Be Responsive…And Quickly
Because Twitter is a public forum, acting fast is necessary, especially in a situation when someone is expressing disgruntlement with your own services. You should acknowledge the issue and offer a resolution as quickly as possible.
Watch for Dissatisfaction
When you’re monitoring Twitter, especially with keywords, take note of tweets that focus on frustration and discontent around the types of services you offer. While the unhappy client may not be a client of yours, watching for complaints can help you identify someone as a potential client. If their reasons for dissatisfaction are areas where you excel, they may welcome and appreciate you reaching out to them.
How do you use Twitter to provide customer service?

For Companies: How To Track Tweets

A Salesforce community manager, Kingsley Josephexplained how he monitors tweets so quickly - he uses a Yahoo Pipe that tracks Salesforce's online word of mouth. He even coded a generic pipe which people can use to track mentions of their company. Here's the pipe.
Via the Church of the Customer blog, here's how to use the pipe:
In the search field, fill out the terms you want to track. For example, Salesforce Ideas could use: "salesforce+ideas", ideaexchange, ideastorm, dellideastorm, mystarbucksidea. Usually the second field (URL fragment to ignore) should be .yourdomain.com . This is to prevent posts made in the your own blog/community from showing up. The dot before the domain is important. The first time you run the search, Yahoo might return an empty list. To force it to go fetch feeds, click "More Options" and then click "Get as RSS". You can then hit back and re-run the pipe successfully. Titles are de-duplicated and sorting is reverse chronological. Multiple search terms can be used and the matched term will be prefixed to the title of the post.
Salesforce's Yahoo Pipes Tool
Other methods for tweet tracking can involve using a service like Tweet Scan, which performs real-time monitoring of Twitter. Take a look at a Tweet Scan for keyword "Starbucks," for example, and see what we can learn:
  • Rom wants to know about the new Pike Place blend
  • Winterheart is drinking Italian Roast.
  • Stlplace thinks Starbucks should be worried because the McCafe iced latte not too bad and it's cheaper ($2.79 for medium size, no extra for syrup)
  • RonHubbard is also digging the new Pike Place blend.
  • tdcool is listening to Starbucks' Ambient Luxe album and thinks it's quite relaxing music
And this was just a cursory look.
Starbucks Tweets
But Tweet Scan isn't the only way to search Twitter. Quotably also does Twitter searches where conversations can be followed in a threaded fashion. Matt Dickman rounds up even more services that may be of use.
For more advice, Charlie O'Donnell good job listing ways a company can use Twitter.
And for companies needing even more help, companies like Radian6 are now offering social media analysis and monitoring solutions for PR and advertising professionals.

For Customers: How to Get Support

In addition to the companies mentioned above, several businesses have "community managers" active on Twitter. These reps act as evangelists, customer service reps, and public faces for the company the represent. Blogger Mario Sundar posted a list of the community managers he found on Twitter (which I edited to remove the people whose Twitter username he couldn't find):
  1. Will Pate: Community Evangelist - ConceptShare (@willpate)
  2. Mario Sundar: Community Evangelist - Linkedin (@mariosundar)
  3. Eric Skiff: Community Evangelist - Clipmarks (@ericskiff)
  4. Marilyn Pratt: Community Evangelist - SAP Labs (@marilynpratt)
  5. Brett Meyers: Community Evangelist - Zloop (@brettmeyers)
  6. Ryan Knight: Community Manager - Yahoo (@yank)
  7. Jennifer Puckett : Community Manager - Disney (?)
  8. Jim Lynch: Community Manager - Ziff Davis (@jwlynch)
  9. Jake McKee: Community Guy - Formerly Lego (@jakemckee)
  10. William Azaroff: Community Engagement - VanCity (@wazaroff)
  11. Carole McManus: Community Specialist, formerly Yahoo 360 (@puttopal)
  12. Asa Dotzler: Catastrophist, Mozilla (@asadotzler
  13. Anand Iyer: Developer Evangelist - Microsoft (@anandiyer)
  14. Damon Billian: Director of Customer Evangelism - Mint (@dbillian)
  15. Domini Perri: Community Manager, Utterz - (@domjp)
  16. Daniel Ha: Disqus (@danielha)
Dominic Perri, the Community Manager over at Utterz, introduced himself in that post's comments, too. (@domjp)
Let's also add Flock (@Flocker) whose community manager is @evanhamilton, Lookery (@Lookery), and Toluu (@calebelston).
I'm sure this list is woefully incomplete, but, despite the numerous Twitter apps, no unified resource of this information is currently available. We encourage companies with a support rep or community manager on Twitter to respond in the comments on this post with your information so our readers can beginning building their own personal Twitter service directories.
And if you've received customer service via Twitter, please feel free to share your stories here.
Share with me at @LinktoHow .

Read More