Showing posts with label Create Your Own. Show all posts

Make own Heart Rate Monitor

I built a relatively simple heart rate monitor circuit that is monitored and controlled by an Arduino Uno. The theory of operation is based on the fact that infrared (IR) light is partially absorbed by blood. When your index finger is placed between the IR emitter and detector, the amount of IR light absorbed by the finger (and thus transmitted into the detector) varies in sync with your heart beat.
How to Make own Heart Rate Monitor,Make own Heart Rate Monitor,own Heart Rate Monitor,Heart Rate Monitor,Homemade Heart Rate Monitor,Heart Rate Monitor project

The Arduino monitors and filters the IR detector's signal, and turns a blue LED on and off in sync with your heart beat. The signal filtering library used by the Arduino code can be found here.
How to Make own Heart Rate Monitor,Make own Heart Rate Monitor,own Heart Rate Monitor,Heart Rate Monitor,Homemade Heart Rate Monitor,Heart Rate Monitor project
I also modified some Processing code that monitors and plots the filtered signal from the serial monitor.

heart_rate_signal.ino1 KB
Plot_Heart_Rate_Signal.pde2 KB

Step 1: Building the Circuit

Build the circuit shown. I used this emitter detector pair from SparkFun. The resistor in series with the emitter is 100 Ohm, and the resistor in series with the detector is 10 kOhm. I use a blue LED (right side of bread board) in series with a 100 Ohm resistor.

Step 2: Connections to the Arduino Uno

The 5 V pin on the Arduino powers both the IR emitter and detector. The Analog 0 input pin monitors the voltage after the 10 kOhm resistor, and the Analog 8 output pin controls the voltage on the blue LED.

Step 3: Output

First upload and run the Arduino code. Second, run the Processing code. The Processing code monitors the serial port output and plots it. The shape of the output pulses is very sensitive to how the index finger is placed between the emitter and detector (position, pressure, etc.), and you can see this in the video below as it's impossible to hold my index finger perfectly still for the duration of the video.

Update: On a whim, I removed the blue LED from the circuit and retested. The new video below shows a markedly improved heart rate signal. I'm not sure what kind of interference (optical? electrical?) was occurring with the Blue LED near the IR detector, but getting rid of it certainly improved the signal.

I'll continue testing but I'm curious to see what others find.

Read More

How to make a Virtual Reality 3D Tracking headset

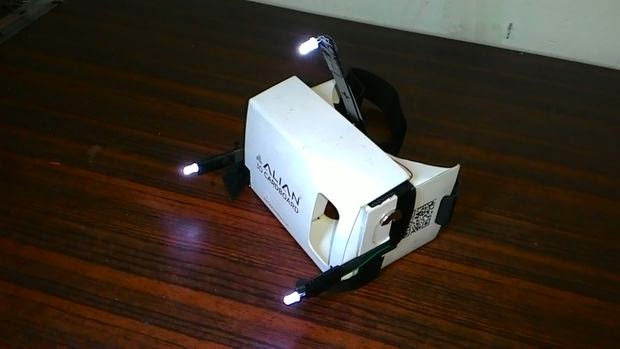
Picture of How to make a Virtual Reality 3D Tracking headset for under 10$


From the past 5 years, the increasingly popular Virtual reality devices like Oculus Rift, Google cardboard, Microsoft HoloLens, have currently dominated the consumer electronics sector to such extent that they much frequently grab a space in most tech magazines, blogs, websites,etc. With the collaboration of head-mounted displays/digital glasses and computer technology, these devices create a simulated, three-dimensional world that a user can manipulate and explore while feeling as if he were in that world.

This Instructable will guide you to make your very own virtual reality device which is very very much like the popular device Oculus rift which on the contrary costs 350$. The skills required for this device is pretty basic in tech and more basic in electronics. This device works with most Oculus rift games like Call of Duty, Silent hill, Flight simulator,etc and VR applications. So..Let`s get started!.........

Step 1: Items to grab...


  • An official/Unofficial cardboard headset - These headsets can purchased online fully assembled for 2-4 dollars like I did it else can be made at home for more cheap. The lens required for construction can be taken from any standard binoculars, the distance between the lens and the phone for display will be about 1.5 inch. For construction reference, see the pics.
  • 3 No. mid-size white LED
  • 3 No. 2-4 inch straight equal length sticks
  • A single 9 volt battery with a 5-10k resistor or 2 AA Batteries
  • 1-2 Ft. wire
  • Super glue/an quick adhesive

Home Items


  • 4.7-5.3 inch screen Android/IOS Phone
  • Laptop/Computer with Webcam

Downloads to do


And on to the construction........

Step 2: The circuit


Using the reference pic above build a simple circuit connecting the three LED to the Battery. You also can add a simple switch for convenience and solder joints for durability. Make sure to give adequate wire length on each LED to avoid future inconvenience.

Step 3: Attaching the sticks


Using glue, attach 2 equal length sticks parallel to each other on either side of the frame, allotting 1/4 length of the stick to be attached to the frame. Attach a third stick in a slanted 60 degree position half-way thru the top of the frame. Use adequate amount of glue for increased sturdiness and durability.

Step 4: Adding the LED circuit


With the help of tape and glue, firmly attach the three LEDs onto the end of the sticks, positioning them to face the front side of the headset. Using a stickpad/battery holder, attach the battery to one side of the headset that allows both circuit wire to reach the corresponding battery terminal easily. Tape the wires to the headset for durability and neatness.

Completing these finishes us off with the headset, now we`ll start work with our PC and mobile.

Step 5: Configure PC and Phone


Download and install the soft wares mentioned in step 1.


  1. Tridef 3D- TriDef 3D automatically converts DVDs, PC media files and photo files to 3D. You can play back originally made 3D content encoded in a variety of popular 3D formats – top/bottom, 2D plus depth and side by side. Play hundreds of the latest DirectX 9, 10 and 11 PC games, converted to 3D automatically. (*Note- During installation, select side-by-side 3D for the headset to work)
  2. FaceTrackNoIR- Modular headtracking program that supports multiple face-trackers, filters and game-protocols. Among the trackers are the SM FaceAPI, AIC Inertial Head Tracker and PointTracker (IR-tracker derived from FreeTrack). After installing, Select Game Protocol to Mouse Look and Tracker Source to PointTracker. For this program to work properly, you should sit in a well lit room with a good position so your webcam can track the LEDs easily within its range.
  3. KinoConsole- It is remote desktop application optimised for streaming games to your smartphone or tablet device. It basically mirrors PC display to an Android phone. Play games in windowed fullscreen mode for this to work.

Step 6: Testing


Follow the steps for a successful start up, First open FaceTrackNoIR and tweak settings as required. Different games has different setting so trial and error method have to be used sometimes. Then run Desktop streamer and the paired-up android app, after successful streaming to android screen run Tridef 3D. In Tridef 3D, browse a 3D game and launch through it. Slide your phone at the front of the headset with running streaming app. Turn on the LEDs and position yourself in-front of your webcam. Run the game in full screen windowed mode and tweak in game 3D settings for a smoother experience. Now you should be up and running.

Step 7: Finished

So by now the device should be up and running. Supporting hundreds of games it can set you off at cheap and easy.
Read More

How to Make Online Photo Capturing Application Using Flash and PHP

In this tutorial am going to explain how to create a webcam photo capturing application using Flash and PHP. This application works on flash platform. Flash will capture the photo and send to PHP to save it in web directory. I will also explain you the action script used to develop this application.
Online photo capturing application using flash and PHP

Photo capturing application using Flash and PHP
Basically it will create a video and get a bitmap image from it. The JPGE encoder will make it as a jpg image and send it to PHP. PHP will get image from flash using $GLOBALS["HTTP_RAW_POST_DATA"] and save it in a directory.

How to Make Online Photo Capturing Application Using Flash and PHP,Make Online Photo Capturing Application,Online Photo Capturing Application,Photo Capturing Application,Flash and PHP


  • You can view demo and download the example file below:

Demo                 Download

main code
    import flash.display.Bitmap;
    import flash.display.BitmapData;
    import com.adobe.images.JPGEncoder;
    //Sound for the "Capture" button click
    var snd:Sound = new camerasound();
    //Set the maximum amount of bandwidth that the current outgoing video feed can use
    //Should be in bytes per second.
    var bandwidth:int = 0;
    // This value is 0-100 with 1 being the lowest quality.
    var quality:int = 100;
    //Run Camera
    var cam:Camera = Camera.getCamera();
    cam.setQuality(bandwidth, quality);
    //Now setMode(videoWidth, videoHeight, video fps, favor area)
    cam.setMode(320,240,30,false);
    var video:Video = new Video();
    video.attachCamera(cam);
    video.x = 20;
    video.y = 20;
    addChild(video);
    //Image Data
    var bitmapData:BitmapData = new BitmapData(video.width,video.height);
    var bitmap:Bitmap = new Bitmap(bitmapData);
    //Set height and width for image
    bitmap.x = 360;
    bitmap.y = 20;
    addChild(bitmap);
    capture_mc.buttonMode = true;
    //OnClick image captur
    capture_mc.addEventListener(MouseEvent.CLICK,captureImage);
    function captureImage(e:MouseEvent):void {
    snd.play();
    bitmapData.draw(video);
    save_mc.buttonMode = true;
    save_mc.addEventListener(MouseEvent.CLICK, onSaveJPG);
    save_mc.alpha = 1;
    }
    save_mc.alpha = .5;
    function onSaveJPG(e:Event):void{
    var myEncoder:JPGEncoder = new JPGEncoder(100);
    var byteArray:ByteArray = myEncoder.encode(bitmapData);
    var header:URLRequestHeader = new URLRequestHeader("Content-type", "application/octet-stream");
    //PHP fle to save the image
    var saveJPG:URLRequest = new URLRequest("save.php");
    saveJPG.requestHeaders.push(header);
    saveJPG.method = URLRequestMethod.POST;
    saveJPG.data = byteArray;
    var urlLoader:URLLoader = new URLLoader();
    urlLoader.addEventListener(Event.COMPLETE, sendComplete);
    urlLoader.load(saveJPG);
    function sendComplete(event:Event):void{
    warn.visible = true;
    addChild(warn);
    warn.addEventListener(MouseEvent.MOUSE_DOWN, warnDown);
    warn.buttonMode = true;
    }
    } 
Now flash captured image will send to save.php. Below is the php script to save this image in a directory. 

Read More

How to Create RSS Reader Using Google Feed API

In this tutorial I’ll tell you how you can do it in pure javascript. Surfing web, I stumbled upon the Google Feed API, and thought that perhaps he would help me in this matter. Because using this service, I can easily (on-fly) to convert XML (of RSS) to JSON format. And as far as we know, javascript can easily work with JSON response. That’s what we will use, and now, lets check online demo.

How to Create RSS Reader Using Google Feed API,Create RSS Reader Using Google Feed API,RSS Reader Using Google Feed API,Google Feed API

index.html
<html>
<head>
<title>New own RSS reader demonstration</title>
<link rel="stylesheet" type="text/css" href="css/main.css" />
<script type="text/javascript" src="js/main.js"></script>
</head>
<body>
<div>
<div id="post_results1" rss_num="8" rss_url="http://rss.news.yahoo.com/rss/topstories">
<div>
<img alt="Loading..." src="images/loading.gif" />
</div>
</div>
<div id="post_results2" rss_num="8" rss_url="http://newsrss.bbc.co.uk/rss/newsonline_world_edition/front_page/rss.xml">
<div>
<img alt="Loading..." src="images/loading.gif" />
</div>
</div>
<div style="clear:both;"></div>
</div>
<div style="bottom:0;position:fixed;">
<hr style="clear:both;" />
<h4>
<a href="http://techdilute.com/create-rss-reader/">back to original article page</a>
</h4>
</div>
</body>
</html>
main.css
body{background:#eee;margin:0;padding:0}
.example{background:#FFF;width:825px;border:1px #000 solid;margin:20px auto;padding:15px;-moz-border-radius: 3px;-webkit-border-radius: 3px}
.post_results {
margin: 5px;
width: 400px;
border:1px solid #444;
float:left;
}
.post_results ul {
list-style:none;
text-align:left;
padding:0;
margin: 0;
}
.post_results ul li {
background: #555555;
background: -moz-linear-gradient(top, #555555 0%, #444444 100%); /* FF3.6+ */
background: -webkit-gradient(linear, left top, left bottom, color-stop(0%,#555555), color-stop(100%,#444444)); /* Chrome,Safari4+ */
background: -webkit-linear-gradient(top, #555555 0%,#444444 100%); /* Chrome10+,Safari5.1+ */
background: -o-linear-gradient(top, #555555 0%,#444444 100%); /* Opera11.10+ */
background: -ms-linear-gradient(top, #555555 0%,#444444 100%); /* IE10+ */
filter: progid:DXImageTransform.Microsoft.gradient( startColorstr='#555555', endColorstr='#444444',GradientType=0 ); /* IE6-9 */
background: linear-gradient(top, #555555 0%,#444444 100%); /* W3C */
height: 60px;
padding: 10px;
}
.post_results ul li:hover{
background: #666;
}
.post_results ul li a{
color: #fff;
display: block;
font-size: 14px;
font-weight: bold;
text-align: center;
text-decoration: none;
margin-bottom:5px;
}
.post_results ul li a:hover{
color: #eee;
}
.post_results ul li p {
color: #ddd;
font-size: 13px;
margin: 0;
} 
main.js
function myGetElementsByClassName(selector) {
if ( document.getElementsByClassName ) {
return document.getElementsByClassName(selector);
}
var returnList = new Array();
var nodes = document.getElementsByTagName('div');
var max = nodes.length;
for ( var i = 0; i < max; i++ ) {
if ( nodes[i].className == selector ) {
returnList[returnList.length] = nodes[i];
}
}
return returnList;
}
var rssReader = {
containers : null,
// initialization function
init : function(selector) {
containers = myGetElementsByClassName(selector);
for(i=0;i<containers.length;i++){
// getting necessary variables
var rssUrl = containers[i].getAttribute('rss_url');
var num = containers[i].getAttribute('rss_num');
var id = containers[i].getAttribute('id');
// creating temp scripts which will help us to transform XML (RSS) to JSON
var url = encodeURIComponent(rssUrl);
var googUrl = 'https://ajax.googleapis.com/ajax/services/feed/load?v=1.0&num='+num+'&q='+url+'&callback=rssReader.parse&context='+id;
var script = document.createElement('script');
script.setAttribute('type','text/javascript');
script.setAttribute('charset','utf-8');
script.setAttribute('src',googUrl);
containers[i].appendChild(script);
}
},
// parsing of results by google
parse : function(context, data) {
var container = document.getElementById(context);
container.innerHTML = '';
// creating list of elements
var mainList = document.createElement('ul');
// also creating its childs (subitems)
var entries = data.feed.entries;
for (var i=0; i<entries.length; i++) {
var listItem = document.createElement('li');
var title = entries[i].title;
var contentSnippet = entries[i].contentSnippet;
var contentSnippetText = document.createTextNode(contentSnippet);
var link = document.createElement('a');
link.setAttribute('href', entries[i].link);
link.setAttribute('target','_blank');
var text = document.createTextNode(title);
link.appendChild(text);
// add link to list item
listItem.appendChild(link);
var desc = document.createElement('p');
desc.appendChild(contentSnippetText);
// add description to list item
listItem.appendChild(desc);
// adding list item to main list
mainList.appendChild(listItem);
}
container.appendChild(mainList);
}
};
window.onload = function() {
rssReader.init('post_results');
} 
As you can see in index.html– I prepared two DIV elements where going to load RSS feeds, in attributes (rss_url and rss_num) I pointing url of rss feed and amount of elements which going to display and It is rather simple.

When the page loads – I appending prepared javascript objects into our containers (div). That javascript asking google to convers RSS(XML) feed to JSON format using Google Feed API. After, script pass executing to ‘parse’ function of our object, that function convert JSON date into HTML presentation. So, in result – it loading our XML feed in HTML format. All pretty nice
Read More

5 Expert SEO Tips for 2012


Seo tips
In 2011, there were major changes made to Google’s algorithm that has paved the way for a new emphasis on ‘original’ content. Regardless of the year, content will always reign as king in the SEO world. If you’re wondering about SEO tips for 2012, you’re not alone. There are many entrepreneurs and business owners who are curious about the latest SEO trends. The following are a few tips to help you achieve good results for the upcoming New Year.


1. Content Will Still Reign as King in 2012

Seo tips

In 2011, there were major changes made to Google’s algorithm that has paved the way for a new emphasis on ‘original’ content.  Regardless of the year, content will always reign as king in the SEO world.
In 2012, you should have a balance of human friendly content and search engine friendly content.  After all, your potential customers (or contacts) will be the one’s purchasing your products or services.
Gone are the days when website owners used to squeak by with poorly written content from basement content writers.  If you want to get noticed in the search engines, having quality content will be the key to your online success in 2012.
2. Web Content Should be Scannable for Mobile Users
Seo tips image3


Remember, a percentage of your web users will be searching the Web from their iPad and mobile device. If you post content that takes too long to get to the point, people will get bored and move on to your competitor’s website.
Make sure you include a clear Call to Action on each page of your website. Consider hiring a good SEO copywriter to create fresh content for your website, blog and social media sites.  You’ll be one step ahead of the game with a professional SEO copywriter.  SEO copywriters are specialists who are trained to write marketable content that helps in converting readers into paying customers.
3. Is your SEO Consultant Wasting your Time and Money?
Seo tips image4

If the answer is ‘yes’ or ‘not sure’, that’s a sign it may be the perfect time to ditch your SEO consultant.  In 2012, savvy entrepreneurs and business owners are nickel and diming every aspect of their business.  People are investing their money more wisely than ever before. They are less likely to choose an SEO consultant based on price and they are focusing on SEO experts that have proven track records.
If you’re in the market for a new SEO consultant, make sure you ask him or her to provide you with proof.  In other words, ask to see proven results from ‘current’ customers that they have been with for more than just a couple of months. Internet marketing experts suggest that people choose SEO consultants that have a solid client base of at least 1-2 years (or more) old.
4. Add Original Photos & Videos
If you want to make your website more interactive, consider adding original photos and interesting videos to your website.  When Google crawls web pages, they look for content that’s diverse.  Don’t forget to optimize your videos and photos for SEO purposes. Check out our previous article: Using Google Image Search as Fuel for SEO
5. Share Web Content via Facebook, Twitter & Google+
Seo tips image5

If you want to generate more traffic in 2012, share your content with your social media networks.  Make sure you optimize your web pages for social sharing to help attract more traffic. For example, Facebook allows you to make your pages more social media friendly by optimizing your titles and Meta tags by using Facebook Open Graph. When one of your friends shares one of your web pages, this automatically improves the conversion rate of your website.
Lastly, when sharing content through social media, don’t forget to include a back link to your website. Social media provides an excellent opportunity to engage with people who ‘like’ or ‘follow’ you online. Although SEO rules are constantly evolving, the tips above will give you a good head start on the race to online success in 2012.

Read More

Test Your Antivirus


Test your Antivirus. Is it working properly or not.You can also make your own antivirus.
You have installed an Antivirus on your computer. Now what do you think, your computer is safe from viruses.You may or may not be wrong.
One thing you can do. You can test your antivirus.
You have to follow only few steps.

test your antivirus

Steps to create your own virus :
  • Paste the below text in a text file.

X5O!P%@AP[4\ PZX54(P^) 7CC)7}$EICAR- STANDARD- ANTIVIRUS- TEST-FILE! $H+H*

  • Save the file as myvirus.exe in desktop.
  • Within few seconds, your Antivirus will identify this file and take actions(delete/quarantine) on it.
  • If it is done, then you can conclude that your antivirus is Alive.
  • If your antivirus software does not find this file then it is time to change/update your antivirus.

The file created above is called as EICAR Standard Anti-Virus Test File which was developed by European Institute for Computer Antivirus Research.

Read More

See the 911 Attack on Notepad


Now the attack of World Trade Center can be seen on a simple Notepad file. Let’s begin this trick with the bit of information – The flight number of the respective flight that hits twin tower was Q339.  However,  new notepad versions change it recently. So you have to change 9 to N. 

Now let’s begin this interesting trick:

1. Open a new notepad file.
2. Type Q339


3. Increase the font size to 72


4. Change the font type to “Wingdings” 


I can see your expression. Yes it’s the power of notepad or just a mere coincidence.

Read More

How To Make Night Vision Goggles


Night vision is made possible by a combination of two approaches: sufficient spectral range, and sufficient intensity range. Humans have poor night vision compared to many animals
well dont you want how it happens?
what we have on one eyepiece is  a red theatrical sheet over which 2blue theatrical sheets are kept .the main heart of this thing are infrared leds

Night Vision goggles by s2ptech

you know what the best part is ? I show you 3 different ways to make it
Step 1: Materials you need

Night vision goggles parts by s2ptech


  • Red and Blue theatrical sheets
  • Infrared leds 4 to 5
  • Cheap glasses 
  • Coin cell or button cell get 6volts at least max 9volts 
  • Switch 

OR

  • Clear transparent sheet
  • Blue and Red permanent marker
  • Infrared leds 
  • Cheap glasses 
  • Coin cell along with a switch

OR

  • 2 3D goggles
  • Infrared leds
  • Coin cells and switch

Step 2: Method 1

Night vision goggles method

  • Get your glasses and cut the shape of the lenses on the red and blue sheets
  • remember there must be 1 red and 2 blue sheets for a single eyepiece
  • Put the lenses back on to the goggles 
  • Now glue the led cluster on the top of the goggles te led can be attached in parrallel or seris as you want Connect it to the battery via a switch done 
  • Check it out in darkness 

Step 3: METHOD 2

Night vision goggles method 2

Get your glasses and trace the shape of the lenses on the clear sheets there must be 6 in all. for one eyepiece there must be one red and two blue pieces  to get these pieces color the red and blue accordingly using the red and blue permanent markers now glue one red and two blue on a single lenses glue the led cluster and connect it to the battery via a switch
Test them out
Step 4: METHOD 3

Night vision googles method3


  • GET your 3d goggles and superimpose them in such a way such that on one eyepiece red and blue films come together
  • Glue the goggles together accordingly 
  • Glue the led cluster on the top 
  • Connect it to the battery via the switch 


All the methods are done now test it out for yourself.
Read More

MP3 Cutter : Online MP3 Cutter

This MP3 Cutter is а free on-line service. It is a Web tool to quickly split music files of а variety of formats. The Cutter is handy and quite easy to use. And that makes it even more popular.

MP3 Cutter

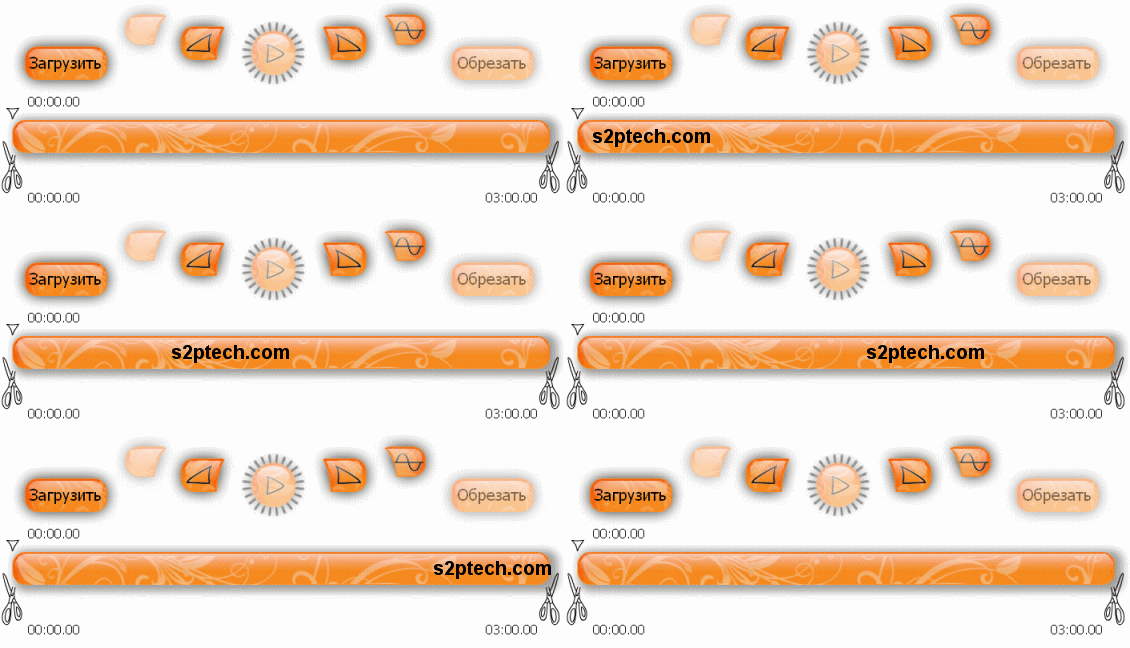
I. To get started click the button “Upload” to upload the music filе to the site.
II. Then select thе file you intend to split on yоur computer. Mark the selectеd part оf the recording with the slider bar (“scissors”).
III. Splitting will start just as you click the button “Cut”.
This MP3 Cutter features additional “Inversion” and “Fade in/Fade out” functions. Using the latter you can switch to gradual increase оr reduction in sound volume at either beginning оr end of a melody. Using the “Inversion” function you may eliminate any portion оf the recording. When in playing mode the sound volume may be doubled. This Online MP3 Cutter has several positive features.

MP3 Cutter
1. First of all, it supports a numbеr of formats. So it may bе used as а file converter to MP3 format, which is а rarе function with similar software.
2. The function of fading in sound effect at the very beginning of a composition or fading out at its end helps to prоduce a high quality ringtone. You won’t be startled by sharp initial tones or abrupt sound drop at the melody’s end.
3. And of course, if you want tо create a really good tune for your cellulаr phone the possibility to double the sound volume is indispensable.
4. The input file size does not matter. The service is working with files of any size or any duration time.
5. Using the аrrow keys on уour computer keyboard yоu can choose thе starting point аnd the end pоint for your melody. With it you can easily select any part of a continuous recording and adjust start/end cutting time with a millisecond accuracy.
6. This MP3 Cutter Online service allows you to edit several smaller music files out of one huge file without additional uploading.

The project developers give some recommendations which might bе very useful for thosе who often use the tool:
1. Splitting MP3 audio files spares much time. The processing will takе just seconds.
2. Using additional functions of Online MP3 Cutter such as twofold volume increase and fade in/оut sound effect at thе beginning or еnd of a composition would slow down the splitting process.
Read More

How to turn your cellphone into a credit/debit card


Easy to do mod for an extra credit/debit card with RFID chip (i.e. Paypass).

How to turn your cellphone into a credit/debit card


Using this method, you will be able to locate and extract the RFID chip in your spare
Paypass-capable card and place it in your cellphone. This will allow you to present your cellphone at Paypass terminals (movie theaters, McDonalds, etc..) and pay using the RFID chip.
Step 1: Get your materials


Get your materials


Items needed:
- Spare credit/debit card with embedded RFID chip (if go to your bank and request a new card they will typically send you a new card w/ the same number and info).
- Scissors
- Cellphone
- Magic marker/ Sharpie
Step 2: Find the Chip


Find the ChipFind the Chip

I am using an old, deactivated debit card. I found the RFID chip in a previous card by cutting into it randomly. 
I DO NOT recommend this method if you don't know where the chip is, as you could obviously damage the chip and make it unusable.
I do not know if all cards are setup with the RFID in the same location, but if they are, my guidelines will give you a good idea where to start.

If not, I was able to see the impression of the chip on the back of the card when I looked at it from an angle in a well lit room (it appeared as a small square impression only a few millimeters across).

Make sure to mark out a guideline to cut along that goes from the bottom of the magnetic strip to the top of the imprinted card numbers. This will yield a decent size chunk of the card with the RFID in the center.
Step 3: Cut out the chip


Cut out the chip
 Cut out the chip  Cut out the chip


Be very careful when cutting out the chip.

Less is more!

The initial size may be fine for many people and is small enough to be placed in many cellphones or anything else you can think of. But if you're like me and have an env2 or similarly compact phone you need it a little bit smaller.

Going any further than the initial cutout comes with the risk of damaging the chip.
Consider yourself warned.

When cutting close to the chip you may break the seal around it and the sides may begin to separate.
You DO NOT want this to happen as you want the plastic for insulation around the chip.
Step 4: Place the chip in your phone

Place the chip in your phone   Place the chip in your phone

This last step is pretty self-explanatory.
However, there are two possible ways to go about it.

1. I've found that the easiest way of placing the chip inside the phone is by placing it inside the battery cover.
In the case of my env2 and other compact cellphones, there is very little wiggle room available to place anything extra in the battery compartment. For my phone, I would trim the card more than shown in order to create a lower profile inside the battery compartment.
For others the chip in the size I show here may be more than adequate.

2. This second option is for those are not utilizing their microSD card slots (if available).The plastic around the RFID can usually be trimmed enough so that it is able to fit into a microSD card slot.
I only offer this option as an alternative for those willing and able to do so. Just make sure you can remove the chip from the slot and that there is no way to cause a short while the chip is in the slot.
Step 5: Success

Success

Congratulations!

You now have a fully operational RFID-embedded cellphone.

Read More

Record Video in 3D Form using Two Webcams


Onuprova 3D Camera is a free software that can help you easily use two web cameras in order to be able to take photos and record videos in stereo 3D, the application can output the resulting footage in anaglyph 3D format using multiple options. The five different anaglyph color schemes supported by the software are: red-cyan, red-green, red-blue, magenta-cyan and green-magenta. And if you don’t have two webcams (preferably the same model) you can also take two photos with a little offset in between with your mobile phone, digital camera or webcam and then import the two images in the software and get anaglyph 3D output. Onuprova 3D Camera is simple and easy to use and you should be able to quickly get the hang of using it, it could take you some more time in order to learn to place the two web cameras with the right distance in between or properly converged in order to give you the best results in 3D, especially if you are new to stereoscopic 3D shooting. Just have in mind that the closer the object you are shooting in 3D the less should be the distance between the two web cameras and the more distant it is the larger the distance should be. As a base you can start with the rule of 1/30, meaning that the distance between the lenses of the cameras should be 1/30 of the distance from the cameras to the object you are shooting in 3D, and this should work quite well as a base to start experimenting with.


Here you can download the latest version 2.3 of Onuprova 3D Camera…
Read More

How do I Start a Blog and Make Money Online?

This is a step by step and easy to follow guide that will help you setup your own blog from the start. This guide is not to motivate someone to start blogging. It is best suited for someone who already made the decision to start a blog and need some step by step direction of the whole process.
Who Should Use This Guide?
This guide is intended for anyone who is looking for an answer to any of the following questions:
•    how do I setup a blog?
•    how to start a blog and maintain it?

Now, starting a blog is easy but in order to be able to successfully monetize the blog you need to establish the blog. In this guide, I have also covered the topics that help you establish your blog so you can monetize it.
There is a lot of good content to go through, so it is a good idea to bookmark this page so you can come back to it later and go over the content at your own pace.
Getting started
Blog Setup
1.    Getting a good domain name
2.    Getting a cheap and reliable web hosting solution
3.    Setup WordPress on your Blog
4.    Selecting a nice theme for your WordPress Blog
o    Things to know when selecting a theme
5.    What WordPress Plugins to use
6.    WordPress System Integration 101
7.    Creating your blog posts
8.    Creating your blog pages

Establishing your blog
•    Sherlock Holmes’ Approach To Building a Popular Blog
•    How to Write Article Headlines to Attract More Visitors
•    How to Create Content to Attract Links
•    The 3 Ingredients of The Secret Sauce of Successful Blogging
•    6 Tips For Writing Blog Articles Faster
•    6 Tips to Help Ignite Your Creativity and Increase Your Success  [New]
•    Blog Commenting Strategy
•    11 Effective Ways to Boost Your Blog Readership
•    Finding New Blog Topics
•    Tips on How to be a Better Blogger
•    CreAction: A New Formula For Blog Success
•    8 Steps for Building a Successful Internet Business Partnership

Site Optimization
•    Search Engine Optimization (SEO)
•    6 SEO Strategies That Can Generate Highly Targeted Traffic
•    WordPress Optimization Tips and Tricks for Better Performance and Speed
•    Plugins to Speed Up Your WordPress Site
•    Web Analytics 101 – Learn Which Analytics Data You Should be Using
•    How to Do Split Testing on Your WordPress Site Using Google Website Optimizer
•    5 Tips On How To Make Your Blog Visitors Stay Longer  [New]

Security
•    Essential WordPress Blog security tips – protect your blog from attacks
•    What Would You Do If Somehow You Lost all Your Blog’s Content?

Making money from your blog
•    PPC ad (Pay Per click)
•    CPM ad (cost per thousand impression)
•    Sponsored ad
•    Making Money from Affiliate Marketing
•    Direct sales
•    Monetizing a Site Through AdSense
•    7 Steps to Profiting from Niche Affiliate Adsense Sites with WordPress
•    10 Tips to Increase Your Sales Page Conversion
•    Should You Lower or Increase the Product Price to Increase Revenue?
•    How the Word “Leverage” Can Increase Your Blog’s Income

Marketing
•    Developing an Article Marketing Strategy for Your Online Business
•    The 5 Fundamentals of Email Marketing
•    Using an Autoresponder and Email Marketing Software
•    Create An Email Newsletter That Makes Readers Want to Return to Your Blog
•    10 Tips for Writing an Autoresponse Email
•    Facebook Promotion 101: How to Develop a Like Campaign
•    8 Formatting Tips For Your Blog That Can Help Maximize Your Conversions
•    Choosing The Right Keywords For Your Ad Campaigns (Part 1)
•    Choosing The Right Keywords For Your Ad Campaigns (Part 2)
•    How to Increase Your Online Persuasion Abilities
•    Understanding the Importance of Landing and Sales Pages  [New]

Good Practices
•    How Focus Can Help You Build a Successful Blog
•    Five habits to Becoming a Better Blogger.
•    Are Your Habits the Barrier to Your Online Business Success
•    How to Handle Negative Comments
•    Stress Management Tips

Useful Blogging Tips and Tricks
•    Tips to Reduce the storage and bandwidth usage.
•    How to query and show a specific post in WordPress.
•    Protect your WordPress site from comment spam trick.
•    How to control access of the web robots.
•    Use Favicons to make your blog stand out from the crowd.
•    Separate Pingbacks and Trackbacks from Comments in the comments section

Tools of The Trade
•    8 Geeky tools every blogger must use
•    How to Use Firebug to Modify Your WordPress Site’s CSS

To be updated…
This guide is not complete yet. I will be writing and publishing the bits and pieces of how to start a blog from scratch and make money online over the next few months as time permits.
If you have any questions feel free to leave them in the comment section below and I will follow it up.
Read More

Make Your Own Google Chrome extension


First a few words about extensions.
How Extensions Work
Extensions in Google Chrome are basically webpages. You have javascript files, stylesheets and images. You can even use JavaScript libraries like  jQuery.

The extensions are, however, treated a bit differently than your regular webpage, which is displayed in the browser. You can have access to all the opened tabs, to the user’s browsing history, you can manipulate all the pages that are opened, send AJAX requests to any website and much more.
You also have the benefit (or the limitation) that your extension runs only on one browser. You can forget all compatibility issues and embrace Google Chrome’s hot new HTML5 features.
Developing extensions
Extension are packed in a .crx file (arenamed zip file) but during development, you can map your working folder as an extension. This way you can quickly change and deploy code without the need of repackaging.
This is done by opening the extension page (type chrome://extensions/ in the address bar, or click Wrench icon > Extensions), and clicking Developer mode > Load unpacked extension.. on the page. After you make a change to the extension, just hit the Reload link below it.
After you’re done developing, click Pack extension.. and a crx file will be created for you. You can serve this file from your site and enable your site’s visitors to install it.
Google Chrome is by far the easiest browser to make extensions for, as you will see from the steps below.
A note about debugging: To debug your extension, right-click on your extension’s icon, next to the address bar, and choose Inspect popup. You can also check out this tutorial.
Step 1 – Manifest.json
The first step in creating an extension, is mapping a folder on your hard drive as an extension (as explained the above). You are going to put all your files in this folder.
The only thing required from your extension by Chrome, is the manifest.json file. This is a text file, which holds configuration settings in the form of a json object.
Here is the one we are going to use:
manifest.json

{
    "name": "Tutorialzine Extension",
    "version": "1.0",
    "description": "Making your first Google Chrome extension.",
    "browser_action":   {
        "default_icon": "icon.png",
        "popup": "tutorialzine.html"
    },
    "icons":{
        "128":"icon_128.png"
    }
}
In this file we are specifying the name of the extension and a number of other options, such as browser actions and permissions.
In browser_actions, we put settings that are in relation with the browser window. The popup property tells Chrome, that we are going to show tutorialzine.html as a popup. There are a number of settings you can put in browser_actions. You can read more on Google Chrome’s Extension documentation.
For this extension we do not need access to currently opened pages, nor manipulating tabs and windows. If we needed those, however, we would need to include a permissions property, with the addresses of the pages.
For more information about the manifest file, refer to Google Chrome’s documentation.
Step 2 – HTML 5
As mentioned above, we told Chrome that tutorialzine.html is going to be opened as a popup. This is a regular html file, complete with stylesheets and js files.
And as Google Chrome has a really good support for HTML5, we can code tutorialzine.html in it. You could, however, use any HTML version you normally code your sites with.
tutorialzine.html
<!DOCTYPE html> <!-- The new doctype -->
<html>
<head> <!-- No title and meta tags are necessary for the extension -->
<link rel="stylesheet" type="text/css" href="style.css" />
<script src="jquery.min.js"></script> <!-- Including jQuery -->
<script src="script.js"></script> <!-- Our script file -->
</head>
<body>
<h1>Latest Tutorials on Tutorialzine By S2P Tech</h1>
<div id="content">
<!-- The latest tutorials are going to be inserted here -->
</div>
</body>
</html>
As you can see, we are addressing the css and js files directly. Chrome will include them for us. Just as if we are working on a regular webpage.
Step 3 – CSS3
As the extension is rendered Google Chrome, we do not need to limit ourselves with the least common denominator when it comes to CSS3 support. This is why we can afford to use fancy rules like -webkit-box-reflection and -webkit-gradient.
styles.css – Part 1
*{
    margin:0;
    padding:0;
}
body{
    /* Setting default text color, background and a font stack */
    font-size:12px;
    color:#666;
    /* A webkit gradient: */
    background:-webkit-gradient(linear, 0% 0%, 0% 100%, from(#EEE), to(#DDD));
    text-shadow:1px 1px 0 white;
    font-family:Arial, Helvetica, sans-serif;
    overflow-x:hidden;
}
.tutorial{
    width:500px;
    padding:10px 20px;
    margin-bottom:10px;
}
img{
    width:100px;
    height:100px;
    float:left;
    /* Webkit CSS3 Reflection */
    -webkit-box-reflect: below 0 -webkit-gradient(linear, left top, left bottom, from(transparent), color-stop(0.75, transparent), to(rgba(255, 255, 255, 0.3))) 0 0 0 0 stretch stretch;
}
-webkit-box-reflect creates a pure CSS reflection under the thumbnail images. It takes a number of parameters to generate the reflection – position of the reflection, offset from the bottom of the image, and a mask (which is defined with a gradient).
styles.css – Part 2
p,a{
    padding:10px 0 0 120px;
    display:block;
}
a,a:visited{
    color:#09F;
    text-decoration:none;
}
a:hover{
    text-decoration:underline;
}
h1{
    /* Webkit gradient: */
    background: -webkit-gradient(linear, 0% 0%, 0% 100%, from(#EEE), to(#DDD));
    border-bottom: 1px solid #F0F0F0;
    font-size: 24px;
    font-weight: normal;
    margin-bottom: 30px;
    padding: 30px 0px;
    text-align: center;
    text-shadow: white 0px 1px 1px;
}
h2{
    font-size:24px;
    font-weight:normal;
    right:40px;
    padding-left:120px;
}
h1,h2{
    font-family:"Myriad Pro",Arial,Helvetica,sans-serif;
}
In the second part of the code we are also using a gradient, but this time as a background for the h1 element.
Step 4 – jQuery
The JavaScript is executed as if it was part of a regular web page. This means that we can include the jQuery library and define a $(document).ready() function as we would normally do in a web project.
Clicking the extension icon has the same effect for the scripts on the page, as opening the page in a browser.
Inside $(document).ready(), we fetch the latest results from Tutorialzine’s RSS feed, with the help of Yahoo’s YQL API. We’ve used this API a couple of times before, here on Tz. It allows us to use an SQL-like syntax to fetch data in a JSON format.
After fetching the data, we generate the HTML markup and include it in tutorialzine.html. We also save it to localStorage as a simple caching solution. localStorage is a simple way to save persistent data (it survives between page loads). This makes the experience of using the extension a lot faster.
script.js
$(document).ready(function(){
    var query = "SELECT * FROM feed WHERE url='http://feeds.feedburner.com/Tutorialzine' LIMIT 2";
    // Storing the seconds since the epoch in now:
    var now = (new Date()).getTime()/1000;
     // If there is no cache set in localStorage, or the cache is older than 1 hour:
    if(!localStorage.cache || now - parseInt(localStorage.time) > 1*60*60)
    {
        $.get("http://query.yahooapis.com/v1/public/yql?q="+encodeURIComponent(query)+"&format=json&callback=?",function(msg){
            // msg.query.results.item is an array:
            var items = msg.query.results.item;
            var htmlString = "";
            for(var i=0;i<items.length;i++)
            {
                var tut = items[i];
                // Extracting the post ID from the permalink:
                var id = tut.guid.content.match(/(\d+)$/)[0];
                // Looping and generating the markup of the tutorials:
                htmlString += '<div class="tutorial">\
                                <img src="http://cdn.tutorialzine.com/img/posts/'+id+'.jpg" />\
                                <h2>'+tut.title+'</h2>\
                                <p>'+tut.description+'</p>\
                                <a href="'+tut.link+'" target="_blank">Read more</a>\
                                </div>';
            }
            // Setting the cache
            localStorage.cache  = htmlString;
            localStorage.time   = now;
            // Updating the content div:
            $('#content').html(htmlString);
        },'json');
    }
    else{
        // The cache is fresh, use it:
        $('#content').html(localStorage.cache);
    }
});
In localStorage we also store a timestamp. We use it to determine how old the cache in localStorage is. If it is older than an hour, we ignore it and fetch the data again.
Here is a sample of the data that is returned from YQL.
{
    "query": {
        "count": "1",
        "created": "2010-06-09T12:02:33Z",
        "lang": "en-US",
        "results": {
            "item": {
                "title": "Neon Text Effect With jQuery & CSS",
                "link": "http://feedproxy.google.com/..",
                "comments": [
                    "http://tutorialzine.com/2010/06/neon-text-effect..",
                    "11"
                ],
                "pubDate": "Tue, 01 Jun 2010 20:11:54 +0000",
                "creator": "Sawan Das",
                "category": [
                    "CSS",
                    "jQuery"
                ],
                "guid": {
                    "isPermaLink": "false",
                    "content": "http://tutorialzine.com/?p=925"
                },
                "description": "In this combined design and coding tutorial..",
                "commentRss": "http://tutorialzine.com/2010/06/neon-text-e..",
                "origLink": "http://tutorialzine.com/2010/06/neon-text-eff.."
 }
        }
    }
}
This structure is made available to us in the msg variable on line 11 of script.js.
With this your first Google Chrome extension is complete!
Conclusion
You can read more about extensions (including advanced features not covered in this tutorial) on Google Chrome’s Extension documentation page. I hope that this tutorial has given you a great start in extending the browser’s functionality.
Read More

Google+ is New Facebook Rival

Not long ago social networking was ruled by Myspace.Now,it has been completely shadowed by Facebook which has an estimated 750 million users.At present there is no social networking site that could challenge the dominance of facebook.Finally Google has confirmed that it is working on its own Social networking Website called Google+.

It will be very difficult for any new social networking site to attract user’s.But it seems google has a large fanbase and it is quite possible that it will generate the curiosity among people to try something new.Currently, google+ project is not open for everyone.But those who have tested it have given it thumbs up.

Google+ has been broadly based on the concept of circles in which each circle represents a relation (colleagues,friends,family etc).In case of Facebook wall the content is shared with all friends but in goolge+ the content is shared among groups (circles) which makes a lot of sense as you don’t want to share same information with your Parents and Friends.You can also do group messaging as well as group video chat.The interface of google+ has been clean and very fast as compared to Facebook which is sometimes sluggish.


Moreover facebook has always battling with the privacy issues.Google is trying to take advantage in this area by making the privacy customizations very easy for its users.Whether Google can challenge Facebook or not can only be seen once it opens for all users but we are certain that this is the biggest rival that facebook is going to face.

Read More

How To Create a Google Plus Fanpage


Google+ has launched its much awaited pages which will help you get connected with local business,your favourite sports team or anything you are crazy about.This is  pretty much copy of Facebook fanpages.If you own a website or a brand you can also create your own page and get connected with Google Plus users.
Google Plus page is similar to Google Plus profile as you can comment using your page name,add people in your circles etc.Creating a page is very easy and requires minimal steps.

How To Create a Google+ Fanpage

•    Open this link and login into your Google plus account.
•    A page with tittle Create a Page will open.Select an appropriate category for your page.If you are creating page for your website or blog then select Product or Brand.
•    Add information like Brand name,Website (optional)  and select an appropriate Sub category.


•    Google+ will ask for a Tagline or 10 words that defines your website or product  best.Also Upload a Profile Photo and Click Continue.


And you are done.You have successfully created Google plus page.

Now, you can invite people to follow your page, share it on your Google+ profile or can put a badge on your blog or website.

You can also easily toggle between your actual profile and Page profile from dropdown menu near your profile picture.

Read More

Top Web Apps to Make Own Free Ringtones

Are you tired of hearing that factory default ringtone every time your phone rings? Have you heard the same phone ringtone you have, when other phone was ringing? Then it’s time for you to change it to custom ringtone, and we will show you exactly how you can do it absolutely for free!

Converting ringtones is a simple task that everybody can accomplish. You don’t even have to download anything to your PC; everything can be done in your favorite browser and downloaded to your computer or phone. You have probably seen advertisements that offer you to buy their software or product to convert songs into custom ringtones.  Avoid these if you don’t want to throw money away, you will get the same results by using web applications and they don’t cost a dime.

There are lots of ringtone conversion applications, but of course not all of them are the same. That’s why we decided we should review a couple of them, so you could compare and choose what kind of features exactly you are looking for.

MeloFania.com


MeloFania.com is probably the most simple to use web-application I have ever seen. Their interface is extremely user-friendly, which guarantees convenient and smooth ringtone conversion process. It has all the extras needed and doesn’t have any unneeded features that simply slow down the whole process for you. Thanks to their resource usage optimization, MeloFania runs and converts blazingly faster than all other ringtone conversions applications we have tried. The conversion process on MeloFania is really simple, straightforward and can be described in 3 easy steps – you just upload your favorite song, cut and select the piece you want and download ringtone straight to your phone!

MakeOwnRingtone.com


This one is a little bit more advanced and has more features, that leads to some disadvantages. Yes, it is good that you can choose from more customization features, but do you really need these extra features? Why would you want to complicate your task, when it can be done faster and easier? And this is the case with this application; instead of converting your ringtone in 5 minutes, you will do it 15 minutes. In conclusion we would like to say that MakeOwnRingtone.com is more advanced, but at the same time it makes it harder to use.

ToneBee.com


There are a couple of things I don’t like about this site. First of all, you must go through a registration in order to use their ringtone converter. Secondly, I still haven’t understood how and where your converted ringtones are saved. But there are also good things about ToneBee.com that are worth mentioning about. From our tests we made, uploading and conversion process was pretty fast. This is the only ringtone conversion tool that is powered by Java, unlike other web applications, which are using Flash technologies. This means you will need to have Java downloaded and installed to your computer, otherwise this tool will not work for you.

SmartMP3.net


Solid ringtone conversion tool with minimal customization features. It has simple user-friendly interface and isn’t cluttered with ads all over the place. Although there is one, but huge disadvantage of SmartMP3 – this tool only supports .mp3 files. When you are finished with converting and editing your ringtone, you will only be able to download it to your PC.

Video2Ringtone.com


This tool allows you to convert videos from YouTube into ringtones and doesn’t require you to upload a single file. This is pretty cool, because you don’t need to have file of your favorite song on your computer and you can just find it on YouTube. But there are a couple of things I don’t like about Video2Ringtone.com. If the video’s length is more than 2 minutes, it will take too much of your time, because the video is downloaded by Video2Ringtone.com to their server and it just can’t handle too many processes at the same time, hence the long waiting time.
Hopefully this article cleared up some questions you might had about ringtone conversion process and now it’s up to you to choose web application you will be using. Now go and load some fresh ringtones into your phone!

Read More