

I tried several software fixes and then dug into the hardware. I even tried an external USB keyboard to no avail. After buying a replacement laptop I decided it would be a good idea to try removing the keys completely, including the board. That was a bad idea.
It didn't solve the problem and it created a new one. To make matters worse that laptop is where my Adobe software lives and I've long since lost the discs and things needed to migrate it to my new laptop.
I finally decided that the real solution was going to be installing a new keyboard and then doing a system restore.
Step 1Finding the right part
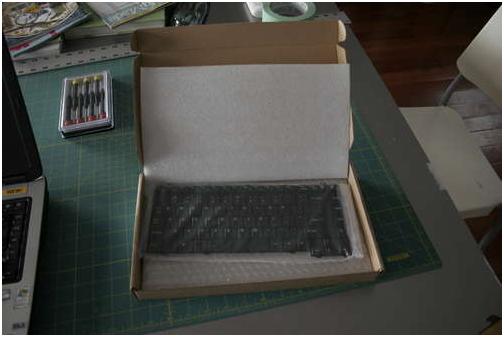
It turns out that an awful lot of Toshiba laptops use the exact same keyboard. That's a good thing. I simply used the model number of my laptop and looked for one on Amazon. It ended up being dirt cheap. So, my hundreds spent on a replacement laptop wasn't all the necessary as it was effectively a $16 problem.
From the looks of things, if you have a Toshiba laptop with a broken keyboard it's a mildly intimidating but simple thing to replace.
Step 2Disassembly


It's always a good idea to unplug any electrical device before working on it or taking it apart and you should also remove any batteries if it runs on those too. So, do that.
I also had no idea how to take the laptop apart and get at the keyboard. Having a spare machine it was easy enough to look up how to do this online.
I can't stress enough the importance of reading instructions first when doing anything like this. For instance disassembly instructions tell you how to take your machine apart but you don't really need to do a full disassembly to get at the keyboard on a Toshiba.
As in the images, gently pry up the plastic cover to access the screws that hold in your keyboard. No need to crack the case.
Once inside remove the two screws that hold the board in place. The other side is just tabs.
Be careful not to yank on it or pull too hard. There is a ribbon cable under there.
With the board free gently pry or lift the black retaining sleeve where the ribbon cable connects to the motherboard and gently pull it free. The space was too cramped to get a shot of this but it'll be obvious when you see it.
This won't take much force. if it does have a closer look and see what's not right.
Step 3While you've got it

Grab some canned air and clean things out. You won't open this thing every day or possible ever again. Make the most of it.
Step 4Install the new keyboard


This is predictably the same thing you did to remove it just in reverse.
Gently insert the ribbon cable into the socket being careful not to push too hard or force it. The shape of the cable and the socket should allow it to line up fairly easily. Once you are sure it's in push the black sleeve back down to lock it in place.
You can now flip over the keyboard and insert the tabs that hold the side closest to you. This should be another gentle operation that doesn't require any forcing of parts into places they don't want to go.
I went ahead and put the retaining screws back in place. You may or may not want to do this but do wait for a boot test before putting the cover back on.
Step 5Test it


Boot that thing up and tap some keys.
Mine needed the time and date reset as well but I'm not sure if that had anything to do with the keyboard swap. Not sure why it would have.
Either way, it made for a good test of the new keys since it required the use of numbers.
If things are working just button it up! The plastic cover just snaps back in.
 |
| !!! Thanks For Visit !!! |


