Make your Blogger Templates : Chapter-4

There are many different tags you can use to include specific pieces of data in your template. They will all be formatted as<data:name/> or <data:name1.name2/>, where name is the name of the particular piece of data you want to use. In the name1.name2 example, name2 is a particular item within a set of data called name1, e.g. photo.url.

This is a master list of all such available data. It is divided into sections by page element, because different types of widgets use different data.
Blogger Design

Globally Available Data
This information applies to the entire page, so you can use it anywhere, unlike other data which can only be used in a specific widget. These should be referenced as part of the overall "blog" data, e.g. as <data:blog.title/>, etc.

  • title: The blog's title.
  • pageType: The type of the current page. One of 'item', 'archive', or 'index'.
  • url: The URL of the current page.
  • homepageUrl: The homepage of the blog.
  • pageTitle: The title of the current page. This is often the blog title, but may contain additional information on archive or post pages.
  • encoding: The encoding to use for the blog, e.g. UTF-8.
  • languageDirection: Either "ltr" or "rtl" for left-to-right and right-to-left languages, respectively.
  • feedLinks: The autodiscovery feed links for the page header.

Page Header
This is a simple widget with just two pieces of data. They can be referenced simply as<data:title/> and <data:description/>.

  • title: The blog's title.
  • description: The blog's description.

Blog Posts
This is the central part of any blog, and the most complex. You should definitely consider simply making modifications to one of the default templates before writing a blog posts widget from scratch. But however you want to do it, here's all the data available in this widget.
feedLinks: A list of feeds for this page. On the main page, this will contain the main blog feeds; on item pages, this will also contain comments feeds. Each item in this list contains the following:
        o  url: The feed URL.
        o  name: The feed name (i.e. 'Posts' or 'Comments').
        o  feedType: The type of feed (Atom or RSS).
        o  mimeType: The mime type of the feed.
olderPageUrl: If there are older posts than the ones on the current page, this is a URL to those posts. Context-sensitive for page type. (Not all pages will have this link.)
olderPageTitle: Title of the link to the older page of posts.
newerPageUrl: The newer equivalent of olderPageUrl.
newerPageTitle: The newer equivalent of olderPageTitle.
commentLabel: The phrase to use to show the number of comments, e.g. "comments."
authorLabel: The phrase to use to indicate who wrote the post, e.g. "posted by."
timestampLabel: The phrase to use to indicate when the post was written, e.g. "posted at."
postLabelsLabel: Phrase to introduce the list of post labels, e.g. "labels for this post."
backlinksLabel: Phrase to describe backlinks to this post, e.g. "links to this post."
posts: A list of all posts for this page. Each post contains the following:
       o  dateHeader: The date of this post, only present if this is the first post in the list that was posted on this day.
       o  id: The numeric post ID.
       o  title: The post's title.
       o  body: The content of the post.
       o  author: The display name of the post author.
       o  url: The permalink of this post.
       o  timestamp: The post's timestamp. Unlike dateHeader, this exists for every post.
       o  labels: The list of the post's labels. Each label contains the following:
           name: The label text.
           url: The URL of the page that lists all posts in this blog with this label.
           isLast: True or false. Whether this label is the last one in the list (useful for placing commas).
      o  allowComments: 'True' if this post allows comments.
      o  numComments: The number of comments on this post.
      o  showBacklinks: Whether to show backlinks for this post.
      o  numBacklinks: Number of backlinks for this post.
      o  addCommentUrl: The URL of the 'add a comment' form for this post.
      o  emailPostUrl: The URL of the 'email this post' form for this post.
      o  editUrl: The URL of the edit form for this post.
      o  feedLinks: A list of feeds specific to this post. (This is different from the overall blog feedLinks, as it may contain a feed for the post's comments, for instance.) Each contains the following:
          url: The feed URL.
          name: The feed name (e.g. 'Posts' or 'Comments').
          feedType: The type of feed (Atom or RSS).
         mimeType: The mime type of the feed.
     o  comments: A list of all comments for this post (on item pages only). Each contains the following:
         id: The numeric ID of the comment.
         body: The body of the comment.
         timestamp: The time the comment was created.
         author: The display name of the comment's author, or 'Anonymous'.
         authorUrl: URL of the comment author's profile, if the comment is not anonymous.
         deleteUrl: The URL for deleting this comment.
         isDeleted: Whether this comment has been deleted. (The text of deleted comments is replaced with a placeholder.)
.
Blog Archives
The different styles provided here are for the different default options on the Page Elements tab. If you're designing a new version, it's easiest to use 'FLAT' as the style, and then manipulate the rest of the data as desired.
title: The title of the widget.
style: One of 'MENU', 'FLAT', or 'HIERARCHY'.
data: A list of each archive unit, each of which contains:
       o  name: The name of this archive interval, e.g. "August 2006."
       o  url: The link to the page containing posts from this interval.
       o  post-count: How many posts there are in this interval.
.
Profile Widget
For a blog with a single author, the profile widget contains the following information. Note that to access different parts of the photo data, you'll use notation such as<data:photo.url/>.
title: The title of the widget.
userUrl: The author's profile URL.
location: The location from the author's profile.
aboutme: The "About Me" information from the profile.
displayname: The author's display name.
photo: The user's profile photo, made up of the following:
        o  url: The photo URL.
        o  width: The photo's width, in pixels.
        o  height: The photo's height, in pixels.
        o  alt: The "alt" text for the photo.
On team blogs, the profile widget contains less information about more authors, as follows.
title: The title of the widget.
authors: The list of all authors, each of which contains the following:
        o  displayname: The author's display name.
        o  userURL: The author's profile URL.
If you want to design your template to handle both single- and multiple-author blogs, you can use the data:team variable to distinguish between the two cases. E.g. <b:if cond='data:team=="true"'> (display multiple authors) </b:if>
.
Text / HTML / JavaScript Widget
The Text widget and the HTML/JavaScript widget work the same way and have the same two pieces of data.
title: The widget's title.
content: The content of the widget.
.
Feed Widget
A feed widget's content is dynamically loaded using Google AJAX API after blog is rendered in a browser. It can be styled only using CSS.
title: The widget's title.
feedUrl: The URL of the feed.
.
Picture Widget
A picture widget contains a single image, and provides all the relevant data for that image.
title: The title of the widget.
sourceUrl: The URL of the image.
width: The image's width, in pixels.
height: The image's height, in pixels.
caption: The image caption.
.
Labels Widget
The labels widget includes a list of all labels that are in use on the blog.
title: The widget title.
labels: The list of labels, each of which contains:
        o  name: The text of the label.
        o  count: How many posts have this label.
        o  url: A link to a page displaying posts with this label.
.
List Widget
The simplest form of a list. Each item is just a single piece of text, without any different types of data within it.
title: The widget title.
items: The list of items.
.
Link List Widget
A slightly fancier list, where each item has two parts to it: the text and the link.
title: The widget title.
links: The list of links, each of which contains:
        o  name: The link's text.
        o  target: The link's URL.
.
Logo Widget
It doesn't get any simpler than this one. Just one piece of data here.
fullButton: The URL of the Blogger button you've selected


Read More

Make your Blogger Templates : Chapter-3

There are many Widget Tags for Layouts.Here you will learn that how can you put widget in blogger, if you are working in the "Expand Widget Templates" mode of the Edit HTML page. I will teach you step by step.

The first thing to do is to add a closing tag. So this:
<b:widget [...attributes...] />
becomes this:
<b:widget [...attributes...]>
</b:widget>
Now with that out of the way, let's talk about what you can put between those tags.


Includes

Blogger Design

Widget content is contained in "includable" sections, which have this format:
<b:includable id='main' var='thiswidget'>
    [insert whatever content you want here]
</b:includable>
The attributes are as follows:
  • id: (Required) A unique identifier made up of letters and numbers.
  • var: (Optional) An identifier made up of letters and numbers, for referencing data within this section. (See the data section below.)
Each widget must have one includable with id='main'. This will usually contain most or all of the content that will display for this widget, and in many cases it will be all you need.
If you make more includables with different IDs, they will not be displayed automatically. However, if you make an includable with id='new', then you can reference it in your main includable with
  <b:include name='new' /> and it will display that way.

The attributes for the b:include tag are as follows:
  • name: (Required) An identifier made up of letters and numbers. It must match the ID of an existing b:includable in the same widget.
  • data: (Optional) An expression or peice of data to pass on to the includable section. This will become the value of the var attribute in the includable.
Here is a simple example demonstrating the use of b:includable and b:include. Loops and data are described later in this article. The main thing to understand here is how the "main" section includes the "post" section within it. It passes along a post that it calls "i" and the included section references it as its var "p", then prints the title.
<b:includable id='main'>
   <b:loop var='i' values='posts'>
      <b:include name='post' data='i'/>
   </b:loop>
</b:includable>


<b:includable id='post' var='p'>
   Title: <data:p.title/>
</b:includable>
Includes are most useful if you have a section of code that you want to repeat multiple times in different places. You can just write the code once, put it inside a b:includable, then use b:include wherever you want it to appear. If you don't need to do that, then you can just stick with the single main includable and not worry about the rest. (Note that the main includable is included automically -- <b:include name='main'/> is unnecessary.)
Data
The data: tag is arguably one of the most important ones, since it's the avenue that brings in all of your actual content. Some examples of this tag are:

<data:title/>
or
<data:photo.url/>
The first example is simplest, and will work in most widgets, since most widgets have titles. All it does is print out the title of the widget. The second example shows a more complex variable, from which we select a particular component. A photo, say in the context of a profile widget, may have components such as url, height, and width. Using the "." notation indicates that we want the URL for this photo, rather than a URL from something else.
There is a great deal of data that you can access with the data: tag, and it varies depending on which widget you're working with. We've got a comprehensive list to help you find the data you need.


Loops
The b:loop tag lets you repeat a section of content multiple times. This is most commonly used for printing out each post in a list of posts for a given page, or each comment, or each label, etc. The general format for using loops is this:
<b:loop var='identifier' values='set-of-data'>
   [repeated content goes here]
</b:loop>
The 'identifier' part can be any name you choose, and will be used to stand in for each new item in the list, each time through the loop. A common convention is to simply call this "i". The set of data you specify for the values can be any piece of data described in the data tags article as being a list of items. For instance, in the blog posts widget,posts is a list. Code like the following will loop through each post, printing out the title for each one, with header tags around it.
<b:loop var='i' values='data:posts'>
   <h2><data:i.title/></h2>
</b:loop>
Notice how "i" takes on the value of each post in turn, so you can get the title from each one.


If / Else
You can use the b:if and b:else tags to display content in some places but not others. The general format is this:
<b:if cond='condition'>
   [content to display if condition is true]
<b:else/>
   [content to display if condition is false]
</b:if>
The b:else tag is optional. Without it, the result will be either the content listed in the b:if section or nothing. The closing </b:if> is required in each case, however.
For "condition" you can put in anything that evaluates to either true or false. Some data tags are simply true/false values on their own, e.g. allowComments on a post. With other pieces of data, you can compare them with specific values to get a true or false. Here are some examples:
<b:if cond='data:post.showBacklinks'> True if the current post is set to show backlinks.
<b:if cond='data:blog.pageType == "item"'> True if the current page is an item page (post page).
<b:if cond='data:displayname != "Fred"'> True if this is not Fred's display name.
<b:if cond='data:post.numComments > 1'> True if the current post has more than one comment.

Read More: 
Read More

Make your Blogger Templates : Chapter-2

Blogger Design


A widget is an individual page element such as a picture, a blogroll, or anything else you can add from the Page Elements tab. A widget in blogger is represented by a tag.The actual data for any given widget is stored in the Blogger database and only accessed when the widget needs to be displayed. Some examples of widgets (one for a page header and one for a list) are:
<b:widget id="header" type='HeaderView' locked="yes"/>
<b:widget id="myList" type='ListView' locked="no" title="My Favorite Things"/>
<b:widget id=”BlogArchive1” locked=”false” mobile=”yes” title=”Blog Archive” type=”BlogArchive”/>
A widget may have the following attributes:
  • id - (Required) May contain letters and numbers only, and each widget ID in your template should be unique. A widget's ID cannot be changed without deleting the widget and creating a new one.
  • type - (Required) Indicates what kind of a widget it is, and should be one of the valid widget types listed below.
  • locked - (Optional) Can be 'yes' or 'no,' with 'no' as the default. A locked widget cannot be moved or deleted from the Page Elements tab.
  • title - (Optional) A display title for the widget. If none is specified, a default title such as 'List1' will be used.
  • pageType - (Optional) Can be 'all,' 'archive,' 'main,' or 'item,' with 'all' as the default. The widget will display only on the designated pages of your blog. (All widgets display on the Page Elements tab, regardless of thier pageType.)
  • mobile - (Optional) Can be 'yes', 'no,' or ‘only’ with 'default' as the default. This decides if the widget will be displayed on mobile or not. Only Header, Blog, Profile, PageList, AdSense, Attribution will be displayed on mobile when the mobile attribute is 'default.'
The types of widgets you can specify are:
  • BlogArchive
  • Blog
  • Feed
  • Header
  • HTML
  • SingleImage
  • LinkList
  • List
  • Logo
  • BlogProfile
  • Navbar
  • VideoBar
  • NewsBar
Each widget can also be written out in an expanded form, detailing the complete layout and contents for that widget.
Read More:

Read More

Make your Blogger Templates : Chapter-1

Design a blogger template is not a big deal.You can design a good and intractive templates for your blog.
You must have knowledge of :
  • HTML
  • CSS
  • JavaScript
It's not mean that you should be expert.But Must have basic knowledge of above mentioned languages.
Now you are ready to make a blogger template.Before this, I want to share some line of codes with you.Before it,You can not make a blogger template.

Blogger Design

Page Elements Tags for Layouts
The <body> section of a Layouts template is made up primarily of sections and widgets. Sections mark out areas of your page, such as the sidebar, footer, etc. A widget is an individual page element such as a picture, a blogroll, or anything else you can add from the Page Elements tab. You can include any HTML you like around the sections in your template.
Each section in your template has an opening and a closing tag, looking something like this:
<b:section id='header' class='header' maxwidgets="1" showaddelement="no"> 
</b:section>
A <b:section> tag can have the following attributes:

  • id - (Required) A unique name, with letters and numbers only.
  • class - (Optional) Common class names are 'navbar,' 'header,' 'main,' 'sidebar,' and 'footer.' If you switch templates later, these names help Blogger determine how best to transfer over your content. However, you can use different names, if you like.
  • maxwidgets - (Optional) The maximum number of widgets to allow in this section. If you don't specify a limit, there won't be one.
  • showaddelement - (Optional) Can be 'yes' or 'no,' with 'yes' as the default. This determines whether the Page Elements tab will show the 'Add a Page Element' link in this section.
  • growth - (Optional) Can be 'horizontal' or 'vertical,' with 'vertical' as the default. This determines whether widgets within this section are arranged side-by-side or stacked.
A section can contain widgets; it can't contain other sections or other code. If you need to insert extra code between or around certain widgets within a section, you'll need to split the section into two or more new sections.

Read More:
Make your Blogger Templates : Chapter-2
Make your Blogger Templates : Chapter-3


Read More

5 Expert SEO Tips for 2012


Seo tips
In 2011, there were major changes made to Google’s algorithm that has paved the way for a new emphasis on ‘original’ content. Regardless of the year, content will always reign as king in the SEO world. If you’re wondering about SEO tips for 2012, you’re not alone. There are many entrepreneurs and business owners who are curious about the latest SEO trends. The following are a few tips to help you achieve good results for the upcoming New Year.


1. Content Will Still Reign as King in 2012

Seo tips

In 2011, there were major changes made to Google’s algorithm that has paved the way for a new emphasis on ‘original’ content.  Regardless of the year, content will always reign as king in the SEO world.
In 2012, you should have a balance of human friendly content and search engine friendly content.  After all, your potential customers (or contacts) will be the one’s purchasing your products or services.
Gone are the days when website owners used to squeak by with poorly written content from basement content writers.  If you want to get noticed in the search engines, having quality content will be the key to your online success in 2012.
2. Web Content Should be Scannable for Mobile Users
Seo tips image3


Remember, a percentage of your web users will be searching the Web from their iPad and mobile device. If you post content that takes too long to get to the point, people will get bored and move on to your competitor’s website.
Make sure you include a clear Call to Action on each page of your website. Consider hiring a good SEO copywriter to create fresh content for your website, blog and social media sites.  You’ll be one step ahead of the game with a professional SEO copywriter.  SEO copywriters are specialists who are trained to write marketable content that helps in converting readers into paying customers.
3. Is your SEO Consultant Wasting your Time and Money?
Seo tips image4

If the answer is ‘yes’ or ‘not sure’, that’s a sign it may be the perfect time to ditch your SEO consultant.  In 2012, savvy entrepreneurs and business owners are nickel and diming every aspect of their business.  People are investing their money more wisely than ever before. They are less likely to choose an SEO consultant based on price and they are focusing on SEO experts that have proven track records.
If you’re in the market for a new SEO consultant, make sure you ask him or her to provide you with proof.  In other words, ask to see proven results from ‘current’ customers that they have been with for more than just a couple of months. Internet marketing experts suggest that people choose SEO consultants that have a solid client base of at least 1-2 years (or more) old.
4. Add Original Photos & Videos
If you want to make your website more interactive, consider adding original photos and interesting videos to your website.  When Google crawls web pages, they look for content that’s diverse.  Don’t forget to optimize your videos and photos for SEO purposes. Check out our previous article: Using Google Image Search as Fuel for SEO
5. Share Web Content via Facebook, Twitter & Google+
Seo tips image5

If you want to generate more traffic in 2012, share your content with your social media networks.  Make sure you optimize your web pages for social sharing to help attract more traffic. For example, Facebook allows you to make your pages more social media friendly by optimizing your titles and Meta tags by using Facebook Open Graph. When one of your friends shares one of your web pages, this automatically improves the conversion rate of your website.
Lastly, when sharing content through social media, don’t forget to include a back link to your website. Social media provides an excellent opportunity to engage with people who ‘like’ or ‘follow’ you online. Although SEO rules are constantly evolving, the tips above will give you a good head start on the race to online success in 2012.

Read More

25 Quick SEO Tips And Tricks To Start Your Blog

You may have heard many people say that blogging is easy. But is it really? There are plenty of bloggers these days; however, not all of them are getting considerable amount of traffic. In fact, some of them only have a few visitors.

WHY?
The main reason for this is that they do not rank well in search engine result pages (SERPs). As a result, they have less visibility on the Web. This further means that their target audience cannot spot them easily. <
What should be the best thing to do then?
If you are one of the following:
  •  Planning to start a blog site
  •  Already blogging but not getting enough readers
  •  Already a successful blogger but wants to hone skills
Find out how you can boost (or further increase) your ranking in SERPs through these…

SEARCH ENGINE OPTIMIZATION STRATEGIES
1. Register your domain name
By doing this, you are off to a good start because you can take advantage of essential blogging features. What is more, you can advertise easily. Of course, do not forget to find an established and dependable Web hosting company.

2. Perform keyword research and analysis
Always find out which terms are most relevant to your blog theme or topics. To help you with this, you need to…

3. Utilize keyword tools
Some of these are free, while others are paid. Whichever you prefer most (while keeping in mind that you need to spend to enhance your online presence), remember that you require tools capable of providing you with fresh and trend-related words.

4. Include keywords in your content
When you put this strategy into practice, consider the following aspects:
  •  Put the primary keyword at the beginning of the page title.
  •  Use popular modifiers (i.e. adjectives, promotional words, places, etc.) for variation.
  •  Use related terms and phrases throughout the article body but make sure your writing style still comes out natural.
5. Get inspiration from YouTube
The video-sharing site has a list of the latest, most favorite, most discussed, and most popular videos. Plenty of these may not be relevant to your theme; however, you can surely find some that you can use as inspiration for your next topics.
Additionally, you can…


6. Use a meme tracker
If you are not familiar with memes, these are videos, images, catch phrases, etc. passed from one Web user to another. You can find out which ones are stirring the latest buzz by using tools that help monitor reader responses.
Moreover, you can…

7. Obtain ideas from social news sites
You can discover trending topics by checking out bookmarkers like Digg, StumbleUpon, and Del.icio.us.
Do not forget to…

8. Check out your competitors’ blogs
Look into other sites within your niche and determine which ones get more readers. Then, find out why many readers link to and talk about them.
With tips 5-8, you can…

9. Come up with fresh ideas
It will be easy for you to write interesting and buzz-worthy posts once you know which topics are trending online.
Do not just settle on appealing content, you should also…

10. Write attention-grabbing headlines
Descriptive, emotionally captivating, and eye-catching – these are what your titles should be, so you can provide a great start to your stories. As a result, plenty of people are more likely to choose your site when they see it in SERPs. Great titles can be in the form of:
  •  Questions
  •  Solutions to problems
11. Highlight your most-read posts on your homepage
By doing this, you can lead new visitors to your top content without asking them to click on several links. Additionally, it lets them have an idea of your blog site theme and initial points of reference without repeating topic ideas.

12. Create categories
When you do, the pages within each group will rank in SERPs for their keywords or tags. As a note, avoid using the same category titles as page tags to keep them from overlapping.

13. Link to previous, succeeding, and related posts
Doing this allows search engines to crawl your site properly and index relevant content. It also helps your readers to spot related topics.

14. Put your post title first
Several content management systems put site names before the post names. To let your articles rank individually, you have to place the page title first.

15. Use web analytics
Through this tool, you will know the following:
  •  Readers linking to your site
  •  Your posts with most links
  •  Search terms used to find your blog
In return, you can guarantee these aspects:
  •  Create link-worthy topics your target audience will like
  •  Come up with topics that rank well in SERPs
16. Stand out
Write stories that you know will get people talking. If you have to stir controversy, why not, right? Some bloggers have earned money and exposure for doing so. Then again, you have to prepare yourself for any negative comeback, which may come your way.

17. Prove your credibility
Here is one tip, which you do not hear that much, about proving you are credible – provide your site with a professional yet attractive custom design and format. Why? Given that you spend time and money on it, it shows that you are truly passionate about your blog.


18. Link to other blog sites
Choose blogs that have the same interests or biases as you. On the other hand, you can mention particular posts and explain your reasons for approving or disapproving the writers’ views.

19. Advertise
By this, it means that you have to set aside money for tools like pay-per-click, AdWords, social bookmarking submissions, and reviews.

20. Take advantage of “push marketing”
It involves using strategies that encourages your target audience to relay your message through word of mouth or sharing.

21. Encourage interaction
You can organize contests or polls on your site to attract more readers. You can also start conversations or ask for opinions on the hottest issues to promote active participation.
When you are able to obtain the interest of several users, the next step is to…

22. Publicize
Display any proof of your accomplishments such as the number of subscribers (especially if you have hundreds) or positive comments from other readers.

23. Be consistent
You will earn greater trust when you have strong beliefs and unswerving biases. As a result, other people will want to share your viewpoints.
24. Submit to general directories
When your blog links appear on leading sites, search engines will consider your site credible and worthy of high ranking.

25. Build exposure and credit
The more users look up on you, the more you will obtain Google’s (and other search engines) vote of confidence.

IN CONCLUSION
After going through the SEO tips, you have probably noticed that some of them require expertise. Then again, you have nothing to worry about. Just think about it, you do not acquire success within a day of blogging. The more you get the hang of it, the easier it will be for you to get that top position in SERPs.
Read More

USB Device not recognized :Fixed


One day I plugged a USB Device into PC or Laptop. Suddenly I got a Pop up message like “USB Device not recognized” .
I unplugged and inserted again my USB. But same result i got. I tried again and again.I didn't get anything new.
This issue can be caused if any of the following situations exist:
  • The currently loaded USB driver has become unstable or corrupt
  • Your PC requires an update for issues that may conflict with a USB external hard drive and Windows
  • Windows may be missing other important updates hardware or software issues
  • Your USB controllers may have become unstable or corrupt
  • Your external drive may be entering selective suspend
  • Your PC motherboard may need updated drivers
usb not recognised

Then I searched on internet for this problem, then i got some solutions. I am going to share with you,
Method I:
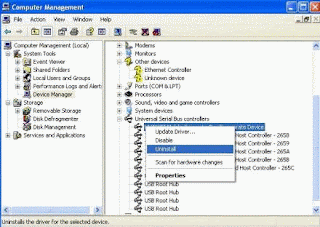
  • Right click mouse on My Computer icon.
  • Click on Manage;

computer manage

  • Go to Device Manager 
device manager

  • Uninstall all of the devices under USB Controllers
  • Restarted the computer, reinstalled the USB drivers, 
But the problem still did not go away!No probs try another methods.

Method 2: 
  • Turn off your computer using Shut Down or pressing the power button.
  • Unplug it from the wall outlet. 
  • Let it sit for about a minute 
  • Plug it back in.
Method 3: 
  • Disable USB selective suspend setting.
  • This method prevents your USB external drive from powering down.
  • Click the Start button, type power plan in the Search box, then click Choose a power plan.
  • Next to your currently selected plan, click Change Plan Settings.
  • Click Change advanced power settings.
  • Click the box to expand USB Settings, then expand USB selective suspend settings.
  • Click Plugged in, then click the drop down menu and select disabled.
  • If you're using a laptop, click Battery, then click the drop down menu and select disabled.
  • Click Apply, then click OK.
If this doesn't resolve your issue, proceed to Method 4.


Method 4:


  • Run regedt32.exe and navigate to; 

HKEY_LOCAL_Machine\SYSTEM\CurrentControlSet\Services\Usb 

  • Create the Usb key if it doesn't already exist. Under this key, create a new DWORD value called DisableSelectiveSuspend and give it a value of 1
  • Then restart the PC. 

Method 5: 

  • Install your motherboard's latest chipset drivers.
  • This method updates your motherboard's chipset drivers, so your computer will recognize your USB external hard drive.
  • Review your computer's documentation which should contain the name of the motherboard manufacturer.
  • Visit your computer manufacturer's support website. For a list of computer manufacturers' support sites, visit: http://windows.microsoft.com/en-US/windows/help/contact-support/computer-manufacturers
  • Navigate their website to find the appropriate drivers for your motherboard. For assistance, contact your computer manufacturer.
If your issue still exists, we recommend contacting Microsoft product support. For information on how to get assistance from Microsoft, please visit: http://support.microsoft.com/select/?LN=en-us&target=assistance&x=7&y=18

Related Post: Usage of USB Drive

Read More

No Donation Only Admission in B.Tech, BBA, MBA., Diploma, BCA, MCA 2012 Only Few seats are Vacant...


Join Top Rank Institution For B.Tech,MBA,M.Tech Admission 2012!
Book your seat India's Top Colleges.Minimum Fees-No Donation

As a result, large numbers of students from all over the country aspire to take admission in Diploma in Engineering, B.Tech in various branches.
IF Your AIEEE rank is not too enough to get admission in reputed colleges in India. Don't worry about Donation.We are here to help those kind of students.If you want to get admission in Haryana and UP colleges. This is right place for you. For More Details: Click Here

With Regards,

Contact Person:

Mr. M. K. Das
Mob: 09990045399,09891538913

Mr. Sawan
09540085199


Read More

Test Your Antivirus


Test your Antivirus. Is it working properly or not.You can also make your own antivirus.
You have installed an Antivirus on your computer. Now what do you think, your computer is safe from viruses.You may or may not be wrong.
One thing you can do. You can test your antivirus.
You have to follow only few steps.

test your antivirus

Steps to create your own virus :
  • Paste the below text in a text file.

X5O!P%@AP[4\ PZX54(P^) 7CC)7}$EICAR- STANDARD- ANTIVIRUS- TEST-FILE! $H+H*

  • Save the file as myvirus.exe in desktop.
  • Within few seconds, your Antivirus will identify this file and take actions(delete/quarantine) on it.
  • If it is done, then you can conclude that your antivirus is Alive.
  • If your antivirus software does not find this file then it is time to change/update your antivirus.

The file created above is called as EICAR Standard Anti-Virus Test File which was developed by European Institute for Computer Antivirus Research.

Read More

Make your own Antivirus

There is no need to buy any Antivirus.Its time to make not purchase an Antivirus.Is it interesting?
Tools required: Only Notepad.
Now lets make an Antivirus.Then follow me.
Steps: 
  • Open Notepad
  • Type in the code shown in the next step(if you want, change the parts that say "Antivirus" and "Your name" into the name you want the AV to be called and "Your name" into your real name (e.g. John Smith):

Make antivirus

@echo off
title Antivirus
echo Antivirus
echo created by your name
 :start
IF EXIST virus.bat goto infected
IF NOT EXIST virus.bat goto clean
cd C:\Windows\system32
 :infected
echo WARNING VIRUS DETECTED!
del virus.bat
pause
goto start
 :clean
echo System secure!
pause
exit

  • Change the "Save as type" section into "All Files," with the file name being [insert your antivirus name here].bat
  • Find the file and open it. You will see a Command Prompt Window doing a scan.
  • Enjoy!


Read More

Usage of USB Drive : Must Read


Multiple use of USB
Use of USB Drive or Pendrive is not limited to transfer and store data.There are lots of usage of USB drive except data storing. Some of them are mentioned below.
1: Run portable applications

In addition to storing your data, you can run portable applications from a USB flash drive. For example, OpenOffice, which is a complete office suite that includes a word processor, spreadsheet, presentation tool, drawing package, and database, is available as a portable application. Mozilla Firefox and Thunderbird are also available as portable applications. When you combine the office suite with the ability to surf the Web and check email, you’ll be able to take your most vital computing applications with you wherever you go — right in your pocket.

If that’s not enough, you can choose other applications to install on your USB flash drive from PortableApps.com (Figure A). You can even install an entire prepackaged suite of applications that includes such things as an audio player, games, an antivirus utility, and a handy menu system.

portableapps

Figure A

The PortableApps.com suite comes with a menu system to allow you to easily access your portable applications.

2: Boot an operating system

If you want to do more than just run your own applications, you might want to consider booting an entire operating system from your USB flash drive. You can boot either Windows or Linux from a USB flash drive; however, the process is not an exact science and you may be in for a technical adventure.
Check following links :
How to install windows 7 from usb flash
How to Put Windows 8 on a Flash Drive

3: Connect to a wireless network

If you have a wireless network, you can use the Wireless Network Setup Wizard in Windows XP or the Windows Connect Now (WCN) feature built into Vista to save wireless network configuration information to a USB flash drive. You can then use your drive to quickly and easily connect another computer or a WCN-compatible device, such as a router or printer, to your wireless network. To learn more about using the Wireless Network Setup Wizard, see the Help And Support Center, which is accessible from Windows XP’s Start menu. To learn more about using the Windows Connect Now feature, see Windows Help And Support, which is accessible from Windows Vista’s Start menu.

4: Create a password reset disk

A password reset disk can really come in handy if you forget the password to your user account on a Windows system that is not a part of a domain. If you find yourself in that situation, you can use the password reset disk to reset your password and quickly get back into your user account. In Windows Vista, you can use USB flash drive rather than a floppy disk as a password reset disk (Figure B). For details on how to do so, see the article Create a Vista password reset disk using a USB flash drive.

password reset disk
Figure B

You can use your USB flash drive as a password reset disk.

5: Boost performance

If you’re running Windows Vista, you can use a USB flash drive to speed up your system with the ReadyBoost technology. ReadyBoost can use the storage space on a USB Flash drive as an additional memory cache to aid the memory cache on your hard disk. And because flash memory is more responsive than a hard disk, with its physical moving parts, the memory cache provided by ReadyBoost can significantly improve system responsiveness.

Using ReadyBoost is easy. You just insert your USB flash drive into your Vista system and follow the onscreen prompts to configure and use ReadyBoost. If you want more details, check out the article How SuperFetch and ReadyBoost work together.

6: Manage it

If all you really want to do with your USB flash drive is transport data, and you’re running Windows XP, you can do so more efficiently with the Microsoft USB Flash Drive Manager (Figure C). Once you have installed this manager, you can easily copy files to and from your drive, back up and restore the entire flash drive to and from your hard disk, change the drive label, and even create an autorun.inf file to launch Drive Manager automatically when you plug in the drive. To learn more about and download the USB Flash Drive Manager visit the Microsoft TechNet Magazine site.

usb flash drive manager
Figure C

The Microsoft USB Flash Drive Manager provides you with a host of features, such as drive backup.

7: Use it as an MP3 player

Would you like to be listening to music when you’re using a computer at the office, but you don’t have an MP3 player? If so, you can use a USB flash drive as an MP3 player along with Windows Media Player and a set of headphones. Just copy your MP3 files to your USB flash drive, plug it into your computer, and direct Windows Media Player to build a library of the songs on your drive. You can use all of Windows Media Player’s playback features, such as playlists and favorites, to easily customize your music listening experience. And best of all, you won’t have to worry about running low on battery power.

8: Password-protect it

If you use a USB flash drive to transport sensitive data that you would prefer to protect from prying eyes, should you lose the drive, Rohos Mini Drive (Figure D) can safeguard that data. This security tool allows you to create a secret partition on the drive and then password-protect/encrypt that partition, thus protecting any documents you copy to that partition via the utility’s file manager. You can download (and read a review of) Rohos Mini Drive at Download.com.

Rohos Mini Drive
Figure D

Using Rohos Mini Drive, you can secure sensitive files on your USB flash drive.

9: Run a Web site from it

If you are a Web developer, you may be interested to know that with Server2Go, you can easily run a Web server that supports Apache, PHP, MySQL, and Perl right from a USB flash drive. You can use Server2Go right out of the box without any installation. It runs on all versions of Windows, supports most common browsers, and is completely free. To a developer, the benefits of having a portable Web server on a USB drive are numerous. For example, imagine being able to carry a live Web site demo into a sales pitch meeting. For more information about this package, visit the Server2Go site.

10: Lock your PC

Have you ever seen a movie in which a person in some secret government installation simply inserts and removes a card to log in and log out of a PC? If you thought that idea was cool, you’ll definitely want to investigate Predator (Figure E). Once installed and configured, this little freeware utility will allow you to turn a USB flash drive into a key you can use to lock and unlock your computer.

lock your pc
Figure E

With Predator, you can use a USB flash drive as a key to lock and unlock your computer.

While the USB flash drive is connected to your computer, everything works as it normally would. Once you remove the USB flash drive, your computer is locked down — the keyboard and mouse are disabled and the screen darkens. To unlock your computer, you just plug in the USB flash drive and the computer will be unlocked and you can begin using it. To learn more about Predator, and/or to download it, visit the developer’s Web site.
Read More

How to Protect Gmail Account by using 2 Step Verification

If you want solid protection of your gmail account then you should read our previous post 4 Solid Tips to Protect Gmail Account From Hackers and if you’re more serious about security of your Gmail account and in anyway you don’t want to compromise with your gmail account and make it bullet proof then this2 STEP VERIFICATION method is for you. Well this is the best security method for Protecting Gmail Account and Currently I am also using this method.

Once you have activated 2 Step Verification of Your Gmail Account then everytime along with your email and password for login you need a special pin which is sent to your phone by gmail. so let’s begin..
Steps to Protect Gmail Account by using 2 Step Verification are as follows :-
1) Login to your Gmail account
2) Click “ My Account “ on top right side of your gmail account [ watch below image for going to My Account ]

gmail account protection 1

3) Now you will be redirected to new page under security options click on ” Using 2-Step Verification” for the Sms Configuring.

gmail account protection 2

4.) Now Click on Start Setup

 gmail account protection 3

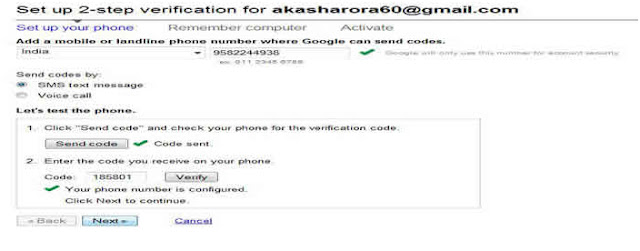
5) Now you’re on Set up of 2 Step verification First Select your Country then enter your mobile number. you can also select the option for getting PIN[ code ] via text or voice call. Now click send code you will got then enter the code to verify and click Next.

gmail account protection 4

6) Again click Next and then click on Turn On 2 Step Verification that’s it.. you’re done now. Now everytime when you sign up to your Gmail Account from any public computer you need code for signing up to your gmail a/c.

Note : Once this service is started you will also received email for backup options.

Read More

Samsung Galaxy Chat Specifications

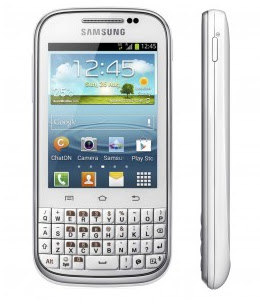
Samsung Galaxy Chat is the latest Smartphone Announced by Samsung. It is one of the few Touch and Type smartphones announced by Samsung, meaning it features both a Touchscreen and a QWERTY keypad.
It offers both the Style of touch and the Simplicity of type.
Don’t Miss : Latest Android Apps for Samsung Galaxy Phones
So today I am sharing with you Samsung Galaxy Chat Specifications:


Samsung Galaxy Chat Specifications
Body And Dimensions


Samsung Galaxy dimension

 Samsung Galaxy Chat has the dimensions of 1118.9 x 59.3 x 11.7 mm, and weighs 112 g.
Moreover, It also comes with a QWERTY keypad.
Display
Samsung Galaxy Chat has a TFT Capacitive Touchscreen, and supports 256K colors.
The screen size (length) is 3.0 inches, and have a resolution of 240 x 320 pixels, at approximately 133 per pixel density.
Moreover, It also supports Touchwiz UX UI.
Sound
Samsung Galaxy Chat supports MP3 ringtones, has a Loudspeaker, and a 3.5 mm Jack.
Memory And RAM
Samsung Galaxy Chat has an Internal Memory of 4 GB. Apart from this, it also supports MicroSD Memory Card, and has an expandable memory of up to 32 GB.
But about the RAM, the RAM size is not known yet.
Data
Samsung Galaxy Chat supports GPRS, EDGE, HSDPA (up to a speed of 7.2 Mbps) and HSUPA  (up to a speed of 7.2 Mbps).
It also supports Wi-Fi 802.11 b/g/n and can be used as A Wi-Fi Hotspot.
It also supports Bluetooth v3.0 with A2DP support.
Whats more? It also supports MicroUSB v2.0.
Camera


Samsung Galaxy Specifications
 Samsung Galaxy Chat has a 2.0 MP camera, with the resolution of 1600×1200 pixels.
It also supports Video Recording at VGA quality@25fps.
However, it does not have a secondary camera.
Software and Hardware Specifications
Samsung Galaxy Chat runs on Android v4.0.4 ICS Ice Cream Sandwich.
Below I have summarized Samsung Galaxy Chat Specifications in tabular form:
[table id=42 /]
Battery
Samsung Galaxy Chat comes with a Standard Li-Ion 1200 mAh Battery. It’s Battery Backup are:
Stand-by: Up to 520 h (2G) / Up to 380 h (3G)
Talk-Time: Up to 14 h 40 min (2G) / Up to 5 h (3G)
Conclusion
Samsung Galaxy Chat is a Good Smartphone. As i mentioned before, It is a Touch and Type smartphone, which features both a Touchscreen and a QWERTY keypad. It offers both the Style of touch and the Simplicity of type.
The screen size of this smartphone is a decent 3.0 inches,  and such a screen size will not cause any trouble when using it’s Touch Facility.
          The only negative Aspect about this Smartphone is that It does not have a Secondary Camera.
If you are okay with it you can go for Samsung Galaxy Chat when it is launched at your Place.
Though the RAM, GPU and Chipset are not known yet, Stay tuned to our blog and we will update them as soon as we come to know about them.

Read More

How to increase width of Post section in Blogger

Increase width of  Post section in Blogger
This is a easy little fix. You have to make two little changes in your CSS style sheet.
Look for this piece of code:
#outer-wrapper {
width: 660px;
margin:0 auto;
padding:10px;
text-align:$startSide;
font: $bodyfont;
}


#main-wrapper {
width: 410px;
float: $startSide;
word-wrap: break-word; /* fix for long text breaking sidebar float in IE */
overflow: hidden; /* fix for long non-text content breaking IE sidebar float */
}
Then make changes to the width. Add the same amount of to each area like this:
#outer-wrapper {
width: 860px;
margin:0 auto;
padding:10px;
text-align:$startSide;
font: $bodyfont;
}


#main-wrapper {
width: 610px;
float: $startSide;
word-wrap: break-word; /* fix for long text breaking sidebar float in IE */
overflow: hidden; /* fix for long non-text content breaking IE sidebar float */
}
Here I added 200px to each area. All that is left to do is save your work!

Related Post: How to Add Extra Sidebar in Blogger?

Read More

How To add extra sidebar in Blogger:

How To add extra sidebar in Blogger:

Follow these steps to get extra sidebar in Blogger:

  • Login to Blogger account.
  • Go to Dashboard>Design>Edit HTML.
  • First Back up your Template.
  • Then follow the instructions given below.
I divide entire code in to section: (1) CSS (2) HTML

Add sidebar in blogger

  1. Firstly concentrate on change to CSS:
#sidebar-wrapper {
                   width: 220px;
                   float: $endSide;
                   word-wrap: break-word; /* fix for long text breaking sidebar float in IE */
                   overflow: hidden;      /* fix for long non-text content breaking IE sidebar float */
                 }
What you will do is copy the whole code, paste it immediately after the existing code, and then rename the element to #sidebar1-wrapper, like this:
#sidebar-wrapper {
  width: 220px;
  float: $endSide;
  word-wrap: break-word; /* fix for long text breaking sidebar float in IE */
  overflow: hidden;      /* fix for long non-text content breaking IE sidebar float */
}


/* additional sidebar start */
#sidebar1-wrapper {
  width: 220px;
background: salmon;
  float: $endSide;
  word-wrap: break-word; /* fix for long text breaking sidebar float in IE */
  overflow: hidden;      /* fix for long non-text content breaking IE sidebar float */
}/* additional sidebar end */
For proper fitting, it needs to increase the width of Outer-wrapper with the same amount as the new sidebar,which is 220px.So, New Outer-wrapper width should be 220+660=880px.
#outer-wrapper {
                 width: 660px; <------ change to 880px
                 margin:0 auto;
                 padding:10px;
                 text-align:$startSide;
                 font: $bodyfont;
               }
3. Change header-wrapper width
To align header with the newly added sidebar, header-wrapper too need to be increased to 880px.
#header-wrapper {
                  width:660px; <------ change to 880px
                  margin:0 auto 10px;
                  border:1px solid $bordercolor;
                }
Now its time to change the footer width.It should be changed to 880px also.
#footer {
  width:660px;  <------ change to 880px
  clear:both;
  margin:0 auto;
  padding-top:15px;
  line-height: 1.6em;
  text-transform:uppercase;
  letter-spacing:.1em;
  text-align: center;
}
Now I are ready to change in HTML.
Look for the following code in HTML.
<div id='sidebar-wrapper'>
<b:section class='sidebar' id='sidebar' preferred='yes'>
<b:widget id='Profile1' locked='false' title='About Me' type='Profile'/>
<b:widget id='BlogArchive1' locked='false' title='Blog Archive' type='BlogArchive'/>
<b:widget id='Label1' locked='false' title='Labels' type='Label'/>
</b:section>
</div>
That is the code for the existing sidebar. To copy the sidebar, do the following:
Copy the code and paste it immediately after the existing code.
Rename the div and b section id’s. The div id must be the same as the id in the CSS which is sidebar1-wrapper.
Delete the widgets in the new sidebar code.
The end result should look like this:
<div id='sidebar-wrapper'>
<b:section class='sidebar' id='sidebar' preferred='yes'>
<b:widget id='Profile1' locked='false' title='About Me' type='Profile'/>
<b:widget id='BlogArchive1' locked='false' title='Blog Archive' type='BlogArchive'/>
<b:widget id='Label1' locked='false' title='Labels' type='Label'/>
</b:section>
</div>


 <!-- additional sidebar start -->
<div id='sidebar1-wrapper'>
<b:section class='sidebar' id='sidebar1' preferred='yes'>
</b:section>
</div>
<!-- additional sidebar end -->
Now you have both CSS and HTML coding for new sidebar.But one of the most important thing is remaining to be complete:
Position of Sidebar:
There are three possible cases are here to discuss.
1. Both sidebars on the right
If you follow above mentioned steps. You will get this arrangement by default.
2.Both sidebars on the left.

To get this arrangement, You have to do some change in CSS. Change the main-wrapper float from $startSide to $endSide and the sidebar-wrapper from $endSide to $startSide.

3. One sidebare on the left and other on the right of the post column(Main column).

In CSS, change the sidebar1-wrapper float from $endSide to $startSide.
In HTML, reposition the sidebar code from after to before the main div code,like this:
<!-- additional sidebar start -->
<div id='sidebar1-wrapper'>
<b:section class='sidebar' id='sidebar1' preferred='yes'>
</b:section>
</div>
<!-- additional sidebar end -->


<div id='main-wrapper'>
<b:section class='main' id='main' showaddelement='no'>
<b:widget id='Blog1' locked='true' title='Blog Posts' type='Blog'/>
</b:section>
</div>
Applying to other templates
The changes above is  for Minima template. For other templates the names of the container elements may be different.
To apply to other templates you need to identify the container elements that correspond to the elements that we changed in Minima. Follow these steps:
Look for elements that have width property (e.g. width:220px;) in CSS.
Once figured out, find the corresponding id (e.g. <div id='sidebar-wrapper'>) inside HTML section.
Note:
Most other templates don't use $startSide and $endSide variables. In that case, just replace $startSide with left and $endSide with right.

Read More